Tuesday, October 29, 2013

Sweet and Tangy Beef and Cabbage Stew

Last week a co-worker of mine brought in sauerkraut and sausage to share at lunch. (There really is no better way to torment a student body than with a staff full of cabbage). So I was telling my husband about it, because he also loves sauerkraut, and instead of saying, "Oh yeah, you should make that," he was like, "You know what sounds good? Brats...with sauerkraut."  Ok, but I didn't want to buy a big jar of kraut only to use a spoonful or two on a brat, so I began googling some creative ways to use up the rest of the jar after brat night. I found a recipe for Bacon, Cabbage, and Beer Braised Pork Loin and used that for my inspiration.

This stew, for lack of a better descriptor, turned out AMAZING. It was incredibly flavorful. The kraut gave it a tang, but the tomato paste sweetened it. It does not have a sauerkrauty taste, so you can serve it to even the toughest kraut critic. I cooked mine in the crockpot, but you could simmer it on the stove just as easily. When I realized it was turning out as a stew-like consistency, I decided to serve it over mashed potatoes. My husband said, "this is the best stew you've ever made." So there.

Sweet and Tangy Beef and Cabbage Stew


Ingredients
2-2.5 lbs beef stew meat (or cut up a chuck roast or rump roast into 1-inch hunks)
4 teaspoons paprika, divided into two
2 teaspoons dried thyme, divided
1/2 tsp salt
1/2 tsp pepper
1 teaspoon dried sage
1-2 Tbsp cooking oil
6-7 slices of bacon, chopped
1 onion, chopped
2-3 cloves garlic, chopped
1 - 32 oz. jar of sauerkraut (minus the two spoonfuls my husband used on his brats the night before)
2 tablespoons tomato paste
1 bottle dark beer (I used Oktoberfest)
1 tablespoon Dijon mustard

Directions
1. In a small bowl, combine 2 teaspoons paprika, 1 teaspoon thyme, 1 teaspoon sage, 1/2 tsp salt, and 1/2 tsp pepper. Stir to combine.

2. Put the stew meat in a large mixing bowl or gallon-sized and sprinkle the rub mixture and mix or shake around so that the meat is coated.

3. Heat oil in a pan and, when hot, brown the stew meat. Do this in batches if necessary. Set aside.

4. In the same pan, brown the chopped bacon. When bacon is mostly cooked, add the garlic and onion and cook another 2-3 minutes over medium heat until onion is slightly browned. Also, lean in and enjoy the smell. What could smell better than bacon, garlic, and onion all sizzling away in a skillet? The answer is nothing. Absolutely nothing.

5. Next, add sauerkraut, tomato paste, beer, mustard, and remaining spices to the bacon and onion mixture and stir to combine. Heat through (another 3-5 minutes).

6. Combine sauerkraut mixture and beef in crockpot. Cook 4-5 hours on high or 7-8 hours on low. You'll know it's ready when the beef is tender enough to be broken up with a fork.

**I served this over mashed potatoes with a side of homemade beer bread. It would also taste great over egg noodles, or in a bowl as a stand-alone stew.

Monday, July 1, 2013

Quick and Easy Cheesy Danish Pastry

It is annoying when friends and family repost recipes on facebook. It fills your feed with highly caloric temptations and gets in the way of reading everyone's opinion about the most recent thunderstorm, however, my aunt posted these and my mom made them and they are so good. They taste like a bakery pastry. In fact, the flavor reminds me of the cheese danishes that you can buy at Arnie's. I would sub low-fat crescent rolls and cream cheese, to make them a bit less guilt-ridden!

Quick and Easy Cheesy Danish Pastry


Ingredients:
2 cans ready to use refrigerated crescent rolls
2 8-ounce packages cream cheese
1 cup sugar
1 teaspoon vanilla extract
1 egg
1 egg white

Glaze:
1/2 cup powdered sugar
2 Tablespoons milk
1/2 teaspoon vanilla extract

Directions:
Preheat oven to 350* degrees and grease a 13X9-inch baking pan. Lay a pack of crescent rolls in the pan and pinch the openings together. Beat the cream cheese, sugar, vanilla, and egg together until smooth. Spread the mixture over the crescent rolls evenly and then lay the second pack of crescent rolls on top of the cheese mixture and brush with egg white. Bake for 35-45 minutes until the top is golden brown. Top with glaze after cooling for 20 minutes.

Monday, February 25, 2013

The BEST Banana Bread Ever!

Three hours of my day I work with at-risk students in a credit recovery program. You can imagine that they are not always the most pleasant youngsters, but for the most part, we've managed to figure things out. They tend to be very guarded by the high school level and if students like this bring you any kind of trinket, you should always be very appreciative.

Well, one day one of my students brought me a slice of banana bread that her mom had made. My grandma is in a bit of a trend where she makes mini-loaves and unloads them on me at every visit. I also make a ton of banana baked goods because we can never seem to get through a bunch of bananas without a few turning brown. But let me tell you, this bread that my student gave me was the BEST I've had. It was sweet, but not cake-like and had a crunchy topping.  I oozed and oozed compliments about this bread and the student (in typical teen manner) just rolled her eyes at me.

Well later that day she had to call home for something and I made sure to tell her "tell you mom that bread was AMAZING! I want the recipe!!"  So the next day, she presents me with a handwritten recipe on the cutest recipe note card. I constantly worry that I'm going to lose this card now that my recipe world is primarily online, so I thought I'd post it here for all of posterity.

I don't have a photo yet because I haven't made a loaf recently...however, after typing this, I probably will and will update with an original photo soon. I just uncovered the card in a pile of papers and figured I better type it now or never!

The BEST Banana Bread Recipe Ever!


Ingredients
- 1 stick unsalted butter at room temp
- 1 cup sugar (yup, that's why it's so good!)
- 2 eggs
- 1.5 cups AP flour (last time I used 1/4 cup whole wheat and the rest AP)
- 1 tsp. baking soda
- 1 tsp. salt
- 1 cup mashed, very ripe banana
- 1/2 cup sour cream or plain Greek yogurt
- 1 tsp. vanilla extract
- 1/2 cup chopped almonds or pecans, chopped - optional
- Additional sugar to sprinkle on top (course sugar would be the best!) - optional

Directions
1. Preheat over to 350 degrees. Grease a loaf pan (or 4 small loaf pans) and set aside.

2. Cream together butter and sugar until fluffy. Add eggs beating well.

3. Sift dry ingredients together and combine with the butter mixture. Blend well.

4. Add bananas, sour cream (or yogurt), and vanilla. Stir well.

5. Add nuts if desired and mix well.

6. Pour batter into loaf pan(s) and sprinkle with sugar if desired.

7. Bake for 60 minutes or until toothpick comes out clean.


Sunday, February 24, 2013

Panera Copycat: Cheesy Broccoli Soup and Spinach Salad

A while ago I tried Panera Bread's new Spinach Power Salad. I generally feel so-so about Panera and the night I had this salad, they were not on their game, let's just say. It sounded good: spinach, roasted mushrooms, bacon, hardboiled egg, and frizzled onions, but I recieved a sloppy mess. The spinach was wilted and there were few ingredients. However, I thought it was an interesting idea for something different when a salad sounded good and I like to think of it as a "man's salad" (and my husband agreed). Haha.

I've had a copycat recipe for Panera's cheesy broccoli soup for years. Basically you make a roux, add equal parts half n half or milk and chicken stock, throw in broccoli and carrots, add the cheese, voila. Easy as that. In fact if you google the recipe, you'll pretty much find this recipe all over the web. Mine never turns out as thick as Panera's, which is fine with me, but otherwise the taste is great.

We enjoyed ours with some warm French bread and dipping oil.

Both recipes follow...

Cheesy Broccoli Cheddar Soup


Ingredients

- 1 large onion, chopped
- 1/2 c. butter
- 1/2 c. all purpose flour
- 4 c. half and half (or milk)
- 4 c. chicken broth (or vegetable stock)
- 1 lb. fresh broccoli, chopped (I use the food processor b/c the husband likes a fine chop)
- 2 cups, shredded
- salt and pepper, to taste
- 1/2 t. nutmeg (I always forget to add this!)
- 16 oz. sharp cheddar cheese, grated

1. Saute onion in butter until soft.

2. Whisk butter and flour over medium heat for 3-5 minutes until thoroughly combined.

3. Add the half n half little by little, stirring constantly (I prefer a whisk). Then add the chicken broth (keep stirring!)

4. Simmer for 15-20 minutes, stirring occasionally.

5. Add broccoli and carrots as well as a bit of salt and pepper and cook over low heat until veggies are tender – about 20-25 minutes. The soup should thicken. Keep the heat low to prevent sticking, but use a lid so it heats through.

6. At this point, I run my immersion blender through the soup to puree the veggies. You can carefully transfer it to a blender as well. Or, you could leave the veggies in chunks. It's all about your personal preference.

7. Then, and most importantly, add the cheese! Continue to simmer and stir occasionally until the cheese has melted.

This makes a big pot, about 8-10 one cup servings. I don't know how it freezes, but I do know that it's even better the next day!

Spinach Power Salad

Salad Ingredients (for two medium-sized salads)
- Warm bacon vinegiarette (recipe below)
- Baby spinach leaves (or any lettuce of your choice if you hate spinach)
- 6-8 slices bacon, cooked and crumbled - reserve the drippings!
- 1 hard boiled egg
- French's fried onions (you know, the ones you put on green bean casserole)
- Roasted mushrooms (recipe below)
- Crumbled gorgonzola cheese (or blue, or Parmesan, or whatever cheese you like)

*Assemble at will!


Roasted Mushrooms
- 1/2 package mushrooms (whole or sliced, button, white, or portabella... doesn't matter)
- Olive oil
- Salt and pepper
- Rosemary and/or thyme, optional

*Toss mushrooms in oil and seasonings and spread in an even layer on a foil-covered cookie sheet or baking dish. Bake in a 475 oven for 15-25 minutes. Whole mushrooms take longer, of course. Pull them out when they are browned and fragrant. Let cool before using on salad.

Warm Bacon Vinaigrette
- Bacon drippings (about 2-3 Tbsp)
- 3 Tbsp red wine vinegar
- 1 tsp sugar
- 1/2 tsp dijon mustard
- salt and pepper, to taste

*In a small sauce pan, whisk together above ingredients on low heat until dissolved. Let cool slightly, but dress salad while dressing is still warm.

Sunday, February 17, 2013

Creamy Tortellini Soup

I usually save crockpot meals for long work days, but the recipe that follows only has to cook 5-6 hours.  From when I start a crockpot in the morning to when I get home from work, it's a minimum of 9 hours. Now, many recipes can simmer longer than they call for: soups, some meats, sauces, but this recipe has tortellini and I was afraid the pasta would get too mushy if I tried it on a work day. So I made it today when I could start it around noon.

This was originally a five ingredient recipe and, like most crock pot recipes, you simply dump everything in and cook.  I found this on pinterest and initially wasn't sure if it was a soup or a pasta dish.  I ended up adding a little cornstarch (technically the sixth and seventh ingredients) because I wanted a thicker sauce. In the end, I decided this was to be a soup. Also, I had one lone chicken breast left from something I made a couple days ago (I can't remember what, isn't that sad?), so I chopped it into really small pieces (about the size of a dice let's say) and threw that in too.  Here's my version....

Creamy Tortellini Soup
Original Inspiration


Ingredients
1 bag of frozen tortellini (I think it was a pound, I pitched the bag before I typed this!)
1 small bag of fresh spinach (My grocery sells whole leaf bundles, so I used one of these and chopped it up)
2 - 14 oz cans of Italian style diced tomatoes, juice and all (or regular diced tomates with 2 Tbsp Italian Seasoning)
32 oz (4 cups) vegetable or chicken broth (I used vegetable)
1-8 oz block of cream cheese, cut into cubes
1-2 chicken breasts, chopped into bite-sized pieces

Directions - Ready for it?
1. Dump everything into your favorite crockpot.
2. Cook on low for 5-6 hours.

*If you want to thicken the sauce a bit, you can stir two tablespoons into 2-3 tablespoons cool water or broth and pour that in to the last half hour or so. For corn starch to "activate" it needs to be fully dissolved in cool liquid, then heated to a gentle boil. Then its thickening powers will take over.

Not as caloric as you'd think:
Makes 8 servings / serving size = 1.5 cups

301 calories / 21 carbs / 16 fat / 20 protein

Sunday, February 3, 2013

Beer and Bacon Mac and Cheese - What more could you ask for?

Well I'm spending the evening with the sniffles and a cup of hot cocoa, so I thought it was a good time to share a recipe I made last week that the hubby really loved.  This is not low fat in any way, but the best mac and cheese recipes aren't!

I adapted it from the blog Simply Delicious, which is written in metric and also made a huge batch of this recipe, so below is my adapted version.

Since I'm in the process of growing another human being, we haven't had much beer or wine in the house. Therefore, I had to buy a bottle just for this recipe. I used Bud Light because it was cheap. As a result, there was not an over-powering beer flavor in this dish. Obviously, a stronger beer would yield a stronger beer flavor if that's what you prefer.

Beer and Bacon Mac and Cheese
Beer & Bacon Mac and cheese
pic from Simply Delicious

Ingredients
- 1/2 lb bacon, diced
- 1/2 stick butter
- 1/4 cup flour
- 1/2 can beer
- 1 cup milk
- 1 cup half and half
- 1 cup mushrooms, chopped
- 2-3 cups strong cheddar, grated (I used a locally made Amish butter cheddar b/c it was creamier - Gouda would be good too!)
- Pinch of freshly grated nutmeg
- 1 teaspoon smoked paprika
- Salt & pepper to taste
- 1 lb pasta (I used penne), cooked according to package directions (reserve 2 cups of the cooking water)
- 3/4 cup Parmesan cheese (or more cheddar if you don't have anything else on hand)
- 3/4 cup breadcrumbs

Directions
1. Pre-heat the oven to 350 degrees and grease a 9x13 oven-proof dish (or any large casserole dish that you fancy).

2.  In a pot or deep skillet, fry the bacon in a large pot until crisp. Remove the bacon from the pot but leave the fat.

3. Add the butter to the bacon fat and allow to melt then add the mushrooms.

4. Saute mushrooms for a minute or two then add the flour and whisk for about a minute.

5. Slowly add the beer, all the while whisking constantly. Do not stop and send a text message.. keep whisking!

6. When all the beer has been incorporated, add the milk and cream and mix until the sauce is smooth. At this point you might need to add a little more liquid, I just add more milk but you can also use chicken stock if you prefer. The sauce will thicken a bit as it cooks, plus in a bit we'll be adding some pasta water, so don't make it too thin.

7. Take the pot off the heat and add the cheese and bacon back to the sauce and stir until the cheese has melted.

8. Once cheese as melted and sauce is thick, stir in the cooked pasta. Add some of the reserved cooking water and mix well. The macaroni needs to be well covered by the sauce and will almost look like it’s got too much sauce covering it. If it doesn’t, add more of the water. If you wanted to be very decadent you could add more cream at this stage too. I added about 1/2-3/4 cups of the reserved water.

9. Mix together additional shredded cheese and breadcrumbs in a small bowl.

10. Transfer the macaroni into the prepared dish and cover with the breadcrumbs/cheese mixture.

11. Place in the oven and allow to bake for 20-25 minutes until the top is golden brown and the sauce is bubbling.

Tuesday, January 29, 2013

Cashew Chicken

There is something about Asian food. I just love it and crave it nearly everyday. Whenever I'm scanning Pinterest, I'm also hooked by any pictures that are Asian in nature.  Stir fry is easy enough, but a lot of at-home Asian recipes are a lot of work.

Over the years I've made sushi, egg rolls, crab ragoons, dumplings, lo mein, fried rice, rice balls, sweet and sour chicken, orange chicken pad thai... you name it, and we've tried to make it at home.  What follows is a recipe for at-home cashew chicken. Like most stir fry recipes, it's pretty quick and easy (once you have all the veggies chopped) and using a rotissere chicken makes the prep even faster.

A while ago I made THESE egg rolls:
homemade egg rolls
and froze the extras, so we reheated those tonight as well.

 I also use THIS recipe as my go-to for fried rice.


And finally, I absolutely love the Tai Pei brand of potstickers:

A great thing about stir fry is you can totally make it your own.  I used chicken and shrimp and then threw in the veggies that we like, but you could use your faves.


Better Than Takeout Cashew Chicken
from Amy's Cooking Adventures


Ingredients
2 cups cooked chicken (I used about 1.5 cups chicken and 1/2 cup shrimp)
1 tbsp olive oil
1 ½ tsp minced garlic (about 3 cloves)
1 cup cashews
¾ cup water
2 tbsp corn starch
2 tbsp white wine vinegar
4 tbsp Hoisin sauce
Chopped veggies of your choice.  I used a handful or two of each:
    - broccoli florets
    - bell pepper
    - mushrooms
    - red onion
    - carrots
3 green onions, green & white parts sliced

Directions
1. In a small bowl, whisk the water and corn starch together, set aside
2. Heat the oil in a large wok or skillet. Add the garlic and cashews and cook for 1 minute. Add in the chicken, followed by the corn starch mixture. Stir to coat the chicken and add in the Hoisin sauce and white wine vinegar. Stir and simmer over low heat for 5 minutes or until the sauce has thickened.

3. Meanwhile, heat another tablespoon of oil in a second wok or skillet. Add the mushrooms and saute until soft (3-5 minutes).

4. Remove the chicken mixture and the vegetable mixture from the heat and stir together in a large serving bowl. Garnish with green onions. Serve over rice with soy sauce to taste.

Tuesday, January 22, 2013

Three Recipes You Must Try This Weekend

It is only when the planets align just so that I follow a recipe to the letter.  There are many reasons for this:

1. I generally don't read right the first time or skim and regret it later
2. I'm often missing an ingredient
3. An ingredient is an expensive specialty item and I replace it with my cheapo version
4. I think more things should be added (generally veggies and spices)
5. I just decide that I can do it better (ha!)

Anyway, below are three recipes that I followed exactly. Mostly because two of them require baking, which is a different world than cooking, and measurements matter. I don't quite feel that my baking skills are proficient enough to warrant ad hoc baking.  The third recipe (the soup) was so simple that there was little I could do to change it!  All of these were absolutely delicious and easy and I will definitely be making them again!  

Click on the title to view the recipe:

Bread can be a daunting undertaking, but this recipe is good and so, so delicious. It uses wheat flour instead of white and is comparable to that yummy dipping bread from Carabas.  This blog in general is great.


What can be better than a recipe that includes only 5 ingredients and requires you to only dump everything together and cook?  It tastes much more gourment than it is - creamy, hearty, and easy!


My husband loves M&M cookies and these are soft, chewy and addicting!
IMG_1778

Monday, January 21, 2013

Accidentally Healthy Meatloaf

There is a local grocery store near me that makes very delicious meatloaf. As a result, I almost never make it from scratch because it is too easy to buy one from the local deli, pop it in the oven, and call it a day. However, Yesterday was cold and wintry and we were home all day, so it seemed like a day when I had no excuse. So I tackled a homemade meatloaf.

This recipe was originally a Rachel Ray recipe, that can be found here, but I didn't make the recipe as written. The original recipe required that you slather the meatloaf mixture in a 9x13 pan, then layer on sliced potatoes, then pour over a swiss cheese sauce. This does sound delicious, but I really wanted mashed potatoes and my small family did not need a 9x13 pan, so I made the meatloaf into two loaves and froze one.

Also, it occurred to me only later that this is a healthier take on a traditional meatloaf. It's a mix of turkey (instead of pork) and ground beef and had hidden veggies (which I SWEAR you won't even taste!). I did lay a few pieces of bacon over the top, so that ruined some of the health-factor I'm sure.

Accidentally Healthy Meatloaf
I forgot to take a picture after it cooked and I forgot, so here is a random google image for you! Ha


Ingredients
*Remember this makes 2 loaves. Cut it in half if you don't want meatloaf mania on your hands!
1 pound ground turkey (I used lean, not extra lean, b/c you want a little fat. Dark meat would be better)
1 pound ground beef
2 carrots, peeled and quartered
1 small beet, peeled and quartered
2 garlic cloves
1 onion, peeled and quartered
2 eggs
1/2 cup marinara sauce (next time I might try BBQ sauce instead)
1/2 cup plain dried breadcrumbs
1 Tbsp salt
1 tsp pepper (or more to taste)


Directions
1. Preheat your oven to 375.  Process carrots, beet, garlic, and onion in food processor (probably in batches, unless you are lucky enough to own a 12 cup, ahem) until veggies are finely chopped.

2. In a large bowl, combine turkey, beef, minced veggies, eggs, marinara, salt, pepper, and breadcrumbs. I used my hands to mix, but supposedly the bread hook of a Kitchenaid works well too. You want all the ingredients to be well-incorporated, but Bobby Flay always warns about over-mixing meatloaf. Well Bobby Flay is welcome to come mix my meatloaf if he's going to be so picky!

3. Anyway, divide the mixture into two globs and form them into a loaf shape. I wrapped one loaf in foil and threw it in the freezer. I omitted the bacon on the freezer loaf.

4. Place loaf in a baking dish, loaf pan, or cookie sheet with sides (it releases a bit of liquid).

5. Lay the bacon strips across the top of the loaf, cover with foil, and bake for an hour. Check temperature after an hour, remove foil, and bake another 15 minutes, so the bacon can crisp. Meatloaf is done when the internal temp reaches 175 degrees. It took mine about 1 hour and 15 minutes. It will depend on the length and thickness of your loaf (haha!).

Mine looked like this pre-baking:

Wednesday, January 16, 2013

Queso Blanco Dip

The husband and I have tried all manner of cheese dips over the years. We have some variation of taco night at least once a week and sometimes we like to make it a really fancy occasion by adding cheese dip.  I don't allow this often because I have, literally, no control over myself when it comes to tortilla chips and cheese dip and I often eat so much that I barely have room for dinner...and I'm always trying to be less fat. Well, not so much now that I'm pregnant, but usually I am :)

Over the years we've tried many variations in an attempt to mimic Qdoba's 3-cheese queso.  The closest we've come is a mix of white American, monterey jack, and a little cheddar cheese combined with oven-roasted poblanos and tomatoes. This is good, but fairly time-consuming as it seems to take forever for veggies to oven-roast long enough to attain that nice char that we all like. That's a weekend activity, not a weeknight one, in my opinion.

Anyway, I pinned this recipe on pinterest months ago and decided to finally give it a try.  It doesn't taste like Qdoba's, but it tastes almost exactly like the cheese dip at the local Mexican restaurant   It was also much quicker than the recipe that requires oven-roasted peppers!

The only downside is that white American cheese (found at the deli counter) is not cheap. Generally around $6.99/lb.  This is good because American cheese is bad for you and you shouldn't eat this dip everyday, but it also stinks because when you do want to make this, the cheese is going to run you about $9.  For a party or a special taco night, however, it's totally worth it!

The story of this particular dip is that the author of the blog, Pennies on a Platter had posted a cheese dip that she liked and in the comments section, someone shared this recipe, which was the one from the Mexican restaurant where she worked. (If this was my employee, I'd fire her immediately for sharing this cheesy secret with the world, haha).

Queso Blanco Dip


1 1/4 (1.25) lb block White American Cheese (Land O'Lakes brand preferred), cut into 1-inch cubes
1/4 cup diced green chiles
2 pickled jalapenos, chopped
1 ounce pickled jalapeno juice
2/3 cup whole milk (I used some half n half that needed to be used up, you could use 2%)
1/2 cup cold water
pinch of cumin (optional) - I chose to omit this

Toss all ingredients into a large microwave-safe bowl. Microwave on high for 5-8 minutes, stopping to stir after every minute. The mixture might seem watery during the first few stirs, but should come together as a nice runny dip after all the cheese is melted.

Serve immediately as a dip with tortilla chips or as a sauce over your favorite Mexican dish.

*Reheat Instructions: Store any leftover cheese dip in the fridge. Reheat in the microwave, stirring every 30 seconds until creamy and hot.

Sunday, January 13, 2013

Creamy Baked Spaghetti

My husband doesn't mind spaghetti, but he doesn't love it.  I've tried baked spaghetti a few times over the years, but I am always disappointed with it. Usually for two reasons: (1) no matter how much sauce I add, it always seems dry and (2) baked spaghetti usually involves a creamy component (ricotta, cottage cheese, cream cheese), but somehow it all blends together and it never tastes creamy.  Well, this recipe below delivers on both counts.  I did add a little extra sauce (because of my fear of dry baked spaghetti) and I used a different shaped pasta (gasp! the scandal!), but either way, this dish is creamy and saucy, just like you're hoping it's going to be when you pin it!

I adapted the recipe from Plain Chicken.com and stole the pic from that site as well.  As I said, I used the tri-colored rotini because 4 ounces has one serving of vegetables! Don't tell you kids (or husband).

Oh, and this recipe is quick and easy - would I ever share one that wasn't?

Creamy Baked Spaghetti


Ingredients
12 oz spaghetti (or shape of your choice..go wild, try bow ties!)
1-2 (28 ounce) jars prepared spaghetti sauce (The orginal recipe calls for 1 jar, I used about 1.5)
1 lb lean ground beef
2 tsp Italian seasoning, divided
1 tsp garlic powder, divided
8 ounces cream cheese
1/2 cup Parmesan cheese, grated, divided
1-1.5 cups mozzarella cheese (I used an Italian blend)

1. Preheat oven to 350 F degrees.

2. In a skillet, brown the ground beef until cooked through, season with 1 tsp Italian seasoning and 1/2 teaspoon garlic powder; drain fat and stir in spaghetti sauce. Set aside.

3. Cook spaghetti according to directions on packet. Drain and place cooked spaghetti in bowl. Add cream cheese, 1 tsp. Italian seasoning and 1/2 tsp garlic powder. Stir until cream cheese is melted and the spaghetti is thoroughly coated.

4. Lightly grease a 9x13" pan. Spread a small amount of meat sauce in the bottom of the dish. Put spaghetti on top of sauce, sprinkle 1/4 cup of Parmesan cheese, then top with remaining meat sauce. Sprinkle remaining parmesan cheese on top and the mozzarella/Italiam blend over top.

5. Bake for 30 minutes, until bubbly. Eat and collect accolades! 

Monday, January 7, 2013

Loaded Potato and Buffalo Chicken Casserole

This is one recipe that I didn't change a bit! I'm happy to say I, for once in my life, followed a recipe as is!  I made it a bit smaller, but did exactly as laid out on the blog Cook Lisa Cook.

It was time consuming in that it took a bit of cooking time, but it didn't require a lot of work or prep on my part.  What you must know, however, is that it was SPICY.  I mean you toss the potatoes AND the chicken in a hot sauce mixture, so what was I expecting, right?  I topped mine with sour cream. The husband used a little blue cheese. I served it with celery sticks and corn bread.  My spice-loving husband ate two heaping bowls. I ate one and am now planning on a handful of tums for dessert :) It was very tasty though and composed of ingredients I pretty much had on hand.

Loaded Potato and Buffalo Chicken Casserole
(The original website has step-by-step directions here.. if you're the visual type)
IMG_3677e
Mine looked exactly like the picture above, so I'm sure yours will too!

Ingredients
- 2 lbs boneless, skinless chicken breasts, cut into 1/2-inch cubes
- 8-10 medium potatoes, cut into 1/2-inch cubes (I peeled, the original author didn't... you decided)
- 1/3 cup olive oil
- 1 1/2 tsp. salt
- 1 Tbsp freshly ground pepper
- 1 Tbsp paprika
- 2 Tbsp garlic powder
- 6 Tbsp hot sauce (I used Frank's Red Hot)

Topping:
- 2 c. Shredded cheese (I used the non-seasoned Mexican mix. Cheddar or colby would be fine)
- 1 c. crumbled bacon (I used bacon bits. The ones that are actually real bacon, not those hard crunchy things)
- 1 c diced green onion

1. Preheat oven to 500F (This is NOT a typo, 500F is correct, so beware when you open the oven for that initial eye-brow-blasting gust of hot air).

2. In a large bowl mix together the olive oil, salt, pepper, paprika, garlic powder, and hot sauce. Add the cubed potatoes and stir to coat. 

3. Carefully scoop the potatoes into a greased 9x13 baking dish, leaving behind as much of the olive oil/hot sauce mix as possible. 

4. Bake the potatoes for 45-50 minutes, stirring every 10-15 minutes, until cooked through and crispy & browned on the outside. 

5.  While the potatoes are cooking, add the cubed chicken to the bowl with the leftover olive oil/hot sauce mix and stir to coat. 

6. Once the potatoes are fully cooked, remove from the oven and lower the oven temperature to 400F. Top the cooked potatoes with the raw marinated chicken. 

7. In a bowl mix together the cheese, bacon & green onion and top the raw chicken with the cheese mix. 

8. Return the casserole to the oven and bake for 15 minutes or until the chicken is cooked through and the topping is bubbly delicious.

Serve with ranch, sour cream, or blue cheese (or all three if that's your thing).

Friday, January 4, 2013

Fish Tacos

My husband grew up in Texas, right on the gulf, and yet his preferred seafood platter is deep fried. He doesn't like much fresh fish, shrimp, or scallops. He will eat salmon (especially if it's grilled), but I think that might be because he's more resigned to the fact that I'm going to keep cooking it, so he better just get used to it.

One of the few places where he will eat a fresh piece of fish (that has not been cooked in hot oil) is in the case of fish tacos. I believe this to be true for two reasons: (1) his love of anything taco trumps his dislike of fish and (2) my fish tacos are amazing! The recipe and ingredients list looks long and intimidating, but I think that's only because I broke it up into step. Have no fear, however, each step is pretty easy and the pay off is totally worth it. Your non-fish eating husband will go back for seconds and thirds.

Fresh Fish Tacos


I've broken the recipe into three parts, which makes the ingredient list look super long.
Here's a shopping list for ya:
- 4 Tilapia fillets
- 1 bunch Cilantro
- Limeade (optional)
- 3-4 limes
- 2-3 garlic cloves
- Coleslaw mix
- 1 red onion
- cherry tomatoes
- 1 avocado (or more if you like to also dip your chips in it!)
- Mayo
- Sour Cream
- Sirracha (or other hot sauce)
- Corn tortillas
- Canola or vegetable oil

Ingredients for each component (this was enough for three tacos each for two of us):

The fish
- 3-4 small tilapia fillets (you could use any white fish: mahi mahi, catfish, cod, or even shrimp!)
- 1/2 cup limeade (I had this handy b/c I make margaritas on the side, but you could use plain lime juice)
- 1/4 cup chopped cilantro (about a handful)
- 2-3 cloves of garlic, minced
- 3-4 Tbsp olive oil
- Seasoning of your choice: I've used Old Bay, Lawry's, or good ole salt and pepper

The slaw - I usually just eye this and make sure the ingredients are evenly distributed. These measurements are estimates.
- 1 small bag of coleslaw mix (you could use just plain shredded cabbage if you prefer)
- 1/4 cup chopped red onion (or more if you prefer!)
- 1/2 cup chopped cherry tomatoes (or less if you prefer... do you see the pattern here?)
- 1/4 cup chopped cilantro
- juice of 1-2 limes (depends on the size and your preference)

Magic Sauce - this I found at The Londoner's website and am now addicted!
- 2 Tbsp mayonnaise (I use the real stuff)
- 3 Tbsp sour cream
- 1/2 - 4 Tbsp sirracha (I used about 1 Tbsp and it had a little kick)

Also needed...
- One avocado (we mash ours, but you could cube or slice) with a little salt and lime juice
- Corn tortillas
- Vegetable or canola oil (to fry the tortillas.. I'll provide a low fat option below)

Phew.. have you made it this far? It sounds like a lot of ingredients and work, but it really isn't! I promise!

1. Marinate the fish.  Combine the limeade (or juice from 2 limes) along with the minced garlic and cilantro. Muddle the cilantro and garlic in the bottom of the bowl. You can use the back of a spoon in you don't have a muddler of any sort. I also picked up this muddling step at the Londoner's website and I like it! Then wisk in the oil.  Place the fillets in a shallow dish and pour the marinade over top. Sprinkle with seasoning of your choice: Lawry's, Old Bay, or salt and pepper. Set aside.

2. Make the slaw. Simply dump the colesalw mix, chopped onion, cherry tomatoes, and cilantro in a mixing bowl. Squeeze the juice of 1-2 limes into the mixture and toss to coat. You want enough juice that the mixture is coated, but not so much that it pools in the bottom of the bowl. Set aside.

3. Make the sauce. Simply combine the mayo, sour cream, and hot sauce in a small bowl. Mix well and pop in the refrigerator until you are ready to serve.

4. Cook the tortillas. I suggest doing step 4 and 5 at the same time. Or, make your husband do step four, while you work on five. Or, just do them one at a time.. it will all be okay in the end.
     - Yummy, but fattening way to cook the tortillas: Heat about 1/2 an inch of cooking oil in a small saucepan over med-high heat (use canola or vegetable, olive oil has too strong a flavor). Test the oil by dipping the edge of a tortilla in the oil, if it begins to bubble right away, then you're good to go. If the oil isn't hot enough, then your tortillas will sit in it and absorb oil, which will yield a greasy mess.  Now, you're only heating the tortillas enough to soften them. We don't want them crispy. So put the tortilla in for about 3-5 seconds on each side - trust me - that's it. Then set on a plate covered with paper towels to cool/drain.
     - Low fat way to cook tortillas: Place your tortillas on a cookie sheet and brush with a thin coating of oil (you can use any type in this case) OR spray the heck out of them with cooking spray. Flip the tortillas and do the same on the back side.  Place under your broiler on low and keep an eye on them! If I had a dollar for everytime I forgot things under the broiler, I would seriously be filthy rich!  Depending on the heat of your broiler it should only take a couple minutes on each side. Again, your goal is only to heat and soften them, not to crisp them.

5. Cook the fish. Heat a medium skillet to med-high heat. I'd recommend cast iron or a grill pan if you have one. Then throw the fish on. They shouldn't need any cooking oil because fish release moisture and because your marinade contains oil. Turn the heat down to medium and cook 3-4 minutes on each side. Mine took a little longer because they were still a tiny bit frozen in the middle. You'll know they are done when you can flake them with a fork and the sides are white. Remove them from the skillet to a plate and use a fork to break the fish up into bite-sized, taco-friendly pieces.

6. Assembly! It's the moment you've been waiting for! Here is how I believe the perfect fish taco should be assembled: first, smear some mashed avocado down the center of your tortilla, top with fish, then slaw and a drizzle of that magical spicy, creamy sauce.  You may need to add a dash of salt or a squeeze of lime to taste. I served these with a side of refried beans. I usually like a margarita on the side, but in this case (because I'm pregnant) I invented the following Marg Mocktail....

Marg Mocktail
1. Rim one glass with course salt (first rub a lime wedge around the top, then dip in salt)
2. Add ice.
3. Fill the cup 2/3 up with limeade.
4. Fill the remainder of the glass with ginger ale.

Not too shabby!
               

Thursday, December 6, 2012

Quick and Easy Granola Bars (No Bake too!)

Now that I'm pregnant, I'm finding that I need to munch throughout the day.  Calorie-counting and exercising for a year had just about broken this habit and now here I am, actually being encouraged by a doctor to eat more!  Well it's easy to load the pantry with granola bars and snack crackers, and trust me, during the first trimester when all you want to do is puke and sleep, I did.  But now, I'm into the honeymoon period (i.e. second trimester) and I'm sick of store-bought granola bars. I find myself standing in the kitchen in the morning lamenting my lack of snack options.  So I decided to make some of my own, with the focus on protein, well, and deliciousness!

Why I like these..
Most importantly? They are delicious. My husband, who is not a granola bar eater, even thinks they're good!

Second, my experience with homemade granola bars tends to be that they require a lot of expensive ingredients (nuts, seeds, etc) and they can be quite crumbly (if not baked) or overly crunchy (when baked).  These have a thin layer of peanut butter shell that helps hold them together so they are the perfectly soft. In addition, all the ingredients are run-of-the-mill baking basics that you probably have in your pantry.

Finally, you can mix and match. I threw in coconut on a whim and a handful of mini-chocolate chips. You could add raisins, dried cranberries, sunflower seeds, peppercorns... ok, I was kidding about that last one. But my point is that you can make these your own. In addition, I used peanut butter chips for the topping, but you could use milk, dark, or white chocolate, or even butterscotch chips! The sky is the limit, as they say.

Quick and Easy No Bake Granola Bars
adapted from Chocolate Covered Katie.com


Ingredients for Bars
1 cup rice crispies
1/2 cup oat flour, packed (see below about oat flour)
1/4 tsp salt
1 tsp vanilla extract
5 tablespoons honey
3 tablespoons pb (or other nut butter)
1/2 cup broken-up pretzels (I didn’t measure and I ran them through my food processor to chop them)

My add-ins: a handful of coconut and a handful of mini-chocolate chips

Topping: Homemade Peanut Butter Shell
1/4 cup of butter
1 cup peanut butter chips (or other flavor of your choice)
1/4 cup oil (vegetable or canola)

**A Note about Oat Flour: No sense in running out to a health food store and spending $8/lb on oat flour. Instead just take 3/4 cup of quick oats and run them through a food processor until they are flour consistency.  I think this recipe would be just find if you left the oats whole as well. Haven't tried it, but knowing my laziness, I will someday!

Directions for the Bars:
1. Mix dry ingredients in a large mixing bowl and set aside.

2. Mix honey, vanilla, salt, and peanut butter until combined.

3. Add the wet ingredients to the dry and stir until combined. Eventually I just gave my hands a spray of cooking spray and dove right in. It was a lot faster than using a spoon.

4. Line a baking dish (8x8 or 9x9) or tupperware with wax or parchment paper. Scoop the  mixture in and smoosh it down evenly. REALLY smush it down! I used my bean masher because it is flat to really flatten the bars.  The firmer you mush, the less crumbly they will be.

5. Pop the bars in the fridge while you make the topping.

Directions for PB Topping:
If you are lucky like me, you have a friend named Katie who makes cakes and cupcakes and her own ice creams and other sorts of sweet delicacies.  She gave me the following recipe for Homemade Magic Shell.  So, what I'm telling you, is that you should double this recipe and use some of it for ice cream sundaes! Remember, the calories don't count when you share! :)

1. Melt the chocolate chips and butter over low-med heat. Keep an eye on it and stir often so that the chocolate doesn't stick or burn.

2. Once the chocolate and butter have melted, stir in the oil until smooth.

3. Pour mixture over bars, smooth out evenly, and refrigerate or freeze. I stuck mine in the chest freezer for about 30-45 minutes and they were good to go!

Tuesday, November 13, 2012

Three Cheese Chicken Alfredo Bake

This is why I love cooking...
I adapted this recipe from Plain Chicken.com and Plain Chicken adapted it from Southern Living! I love that recipes are living things that grow and change over time. I also love recipes that are versatile because I often change my mind regarding dinner at the last minute and I'm a fan of recipes that just require throwing ingredients together and calling it a day, especially when I can change up those ingredients according to what I have on hand.

This recipe has been halved. If you double it, you can bake it in a 9x13. I cut it in half because there are only 2.5 of us and even still, I'll be bringing lunch for my co-workers tomorrow!

Three Cheese Chicken Alfredo Bake
adapted from Plain Chicken


Ingredients
1/2 box (8-ounce) penne macaroni (or whatever shape you have on hand)
1 (15-ounce) containers refrigerated Alfredo sauce
1 cup sour cream
1 cup container cottage cheese (you could use ricotta too, I just prefer cottage cheese)
1 large egg, lightly beaten
1/4 cup grated Parmesan cheese
1/4 cup chopped fresh parsley (fresh adds a lot more flavor than dried)
2 Tbsp olive oil
2 garlic cloves, minced
1/2 cup chopped mushrooms
1.5 cups cooked chicken, chopped (I used a rotisserie chicken)
5 oz (1/2 of a 10 oz package) frozen, chopped spinach (defrosted and drained - you literally have to wring it out)
1 cup mozzarella cheese

Directions:

1. Prepare pasta according to package directions; drain and return to pot.

2. Add to noodles: Alfredo sauce, sour cream, cottage cheese, egg, Parmesan and chopped parsley. Stir to combine.

3. Add oil and minced garlic to a skillet and heat on medium until garlic just begins to cook.  Add mushrooms and continue cooking a few more minutes until mushrooms begin to soften.  Add chicken and spinach and heat through (another couple minutes).

4. Add chicken mixture to pasta mixture and stir to combine. I added a little pepper too because the hubs loves peppery Alfredo sauce.

5. Transfer mixture to a lightly greased casserole dish, top with mozzarella, and bake at 350 degrees for 30-40 minutes (depending on the depth of your casserole dish) until browning and bubbly.

6. Serve with soft, buttery breadsticks or garlic bread (and maybe a salad if you're the healthy type).

*Other veggies that would be be good? Broccoli, bell peppers, onions, asparagus, or chopped tomatoes (probably not all at the same time though!)

*This would also be delicious with the addition of cooked, chopped bacon... but then again... what wouldn't?

Monday, November 5, 2012

Hummus

I've had a hummus recipe for a couple years now that I accumulated from somewhere or someone.  I don't know why I've never made it, but yesterday, my mom (who is currently vacationing near Key West) was sending me texts  (including pictures) of this veggie and hummus plate they had made after visiting a local farmers market. This kind of got me thinking about hummus and veggie trays, so I decided to give it a go. It's really as simple as dumping all the ingredients into a food processor and giving it a-whirl.  I thought this turned out so delicious, that I will probably never buy it from the store again!

Hummus

Ingredients:
2 cans garbanzo beans, drained (I used salt-free)
1/2 c tahini
1/3 c warm water
1/3 c olive oil* (see below)
Juice of 2-3 lemons (I used 6 Tbsp of bottled lemon juice)
4 (or more) garlic cloves (I used 4 large ones)
1.5 tsp salt
2 tsp cumin

Directions:
Combine all ingredients into a food processor and blend.

*I only have a 6 cup food processor (because I'm STILL waiting for Santa to bring me a 12-cup) so I had to process in batches.  Therefore, I combined all the ingredients except the oil in a mixing bowl, then poured half into the processor. I then added oil while it was blending until it was the consistency I liked. I scooped it out, then added the other half and did the same thing again.  What I'm saying is, use the oil to adjust the hummus to your desired smoothness.

*Also, I added a roasted red pepper (the jarred kind) to half of the batch because that's my favorite flavor of hummus. So I ended up with half plain and half red pepper flavored.

Today for lunch I brought an "adult lunchable" which consisted of some thin sliced salami, a few cubes of good sharp cheddar, some grapes, a glob of hummus, some cucumbers and cut up naan bread.  It's only 8:30 and I'm already looking forward to it!

Best of luck!


Monday, October 22, 2012

Mom's Tallarines

I'm not entirely sure where this recipe originally came from, but my mom has been making it for quite a while.  I'm not even sure of its original ethnicity. When I run a google search I find Italian translations and recipes, as well as a Peruvian dish.  All I know, is this makes one big pot of hearty, comfort food goodness.  Tallarines provide the heartiness of a good beef stew, but the tomato sauce adds a different, tangier twist. It does make a large quantity so it's a great dish for company. It also simmers in a pot or crock pot all day, which is another factor that makes it perfect for entertaining - little work, lots of glory! Serve it over egg noodles and with some crusty bread on the side and there won't be a rainy day you can't handle!

Mom's Tallarines


Ingredients
2 lb. rump roast, lean; trim fat
3-6 cloves garlic, peeled and whole (really large cloves could be cut in half)
3 Tbsp oil (vegetable, canola, or olive - choose your poison)
2-3 medium sized chopped onions
3/4 cup fresh chopped parsley (or 2-3 Tbsp dried) I used 3 Tbsp Italian Seasoning mix
2-14 oz cans Italian tomatoes (diced or stewed), undrained
2-6 oz cans tomato paste
2-3 cups water
1 jar pimiento, chopped (I used diced red pepper because I had it on hand they are practically the same thing)
4 large carrots, peeled and sliced
3 bay leaves
salt and pepper, to taste
1 cup dry sherry (or leftover red wine that you might have on hand)
1/2 pound chopped mushrooms
1 lb egg noodles

Directions
1. Trim fat from roast. 

2. Make slivers in beef with a sharp knife and insert garlic cloves. I added three cloves to each side of the roast.

3. Heat oil until hot and brown roast on both sides.

4. In the same pot add onions, parsley, tomatoes, paste, pimento, carrots, bay leaves, sherry, and salt and pepper. Add 2 cups of water to start. As it cooks, you can add a little more if you want a soupier consistency. Stir to combine.

5. Cover and simmer 6-8 hours. I did this on the stove, but you could throw the whole thing in a crock pot as well.

6. Check for doneness by sticking a fork in the roast and twisting. If the meat breaks apart easily, then it's done. Use tongs to remove the roast from the pot and shred with a fork. You might be able to do this in the pot if your roast is very tender.

7. Add meat back to the pot and add the mushrooms.

8. Simmer another 20 minutes.

9. In the meantime, cook egg noodles according to package directions.

To Serve:
Dish up egg noodles and top with stew mixture. Garnish with shredded cheddar cheese, if desired. I recommend serving with crusty bread. I made a batch of my top secret beer bread. I'll probably post this recipe another time ;)

Thursday, October 11, 2012

Gooey Patty Melts

These are not low fat, but man are they so, so good. This recipe is, quite literally, the path to my husband's heart. We were inspired to begin making our own patty melts after a bad Steak 'n Shake frisco melt experience. There are some secrets to the perfect patty melt: caramelized onions, Swiss AND American cheese, and some copycat version of frisco sauce.

Gooey Patty Melts
adapted from From Away.com
Patty Melt

Ingredients (for 4 sandwiches)

4 slices of bread of your choice (rye is tradition, I used multigrain ciabatta rolls that I found at Meijer)
3 tablespoons butter
4 slices Swiss cheese
4 slices American cheese
1 pound ground beef
1 large white onion, thinly sliced

Frisco Sauce Ingredients
1/4 cup mayo (the real stuff)
1 Tbsp + 1 tsp ketchup
1 tsp sugar
1/2 tsp dill pickle relish

Directions
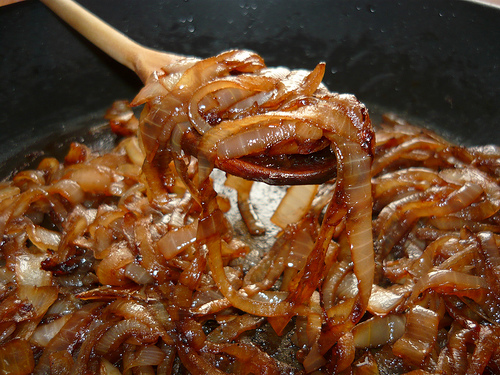
1. First caramelize the onions: melt the butter in a saute pan then add the sliced onions. Turn the heat to medium, cover, and stir every five minutes or so.  You want to cook the onions until they are a nice golden brown color. Like this:

Now, the correct way to do this is to let the onions slowly simmer on low heat for almost an hour. I generally keep the heat around low-med and med so that it happens in something closer to 15 minutes. You want to stir every so often to be sure they aren't sticking or burning. When they're done, drain the excess oil, if needed.

2. Separate the ground beef into four patties. Season with salt and pepper or seasonings of your choice and cook to desired doneness in a skillet (we like medium well).

3. Next, whip up the copycat frisco sauce. Simply stir together mayo, ketchup, sugar, and relish. Set aside.

4. Assemble the sandwiches in the following order: bottom slice of bread, Swiss cheese, burger patty, frisco sauce, onions, American cheese, top slice of bread.

5. Spray a skillet with cooking spray, heat it up, then through the sandwich on and brown each side (like you're making a grilled cheese). I sprayed an additional time in between flipping the sandwich.

6. Serve with french fries and a milkshake and you'll never need Steak 'n Shake again!

Sunday, October 7, 2012

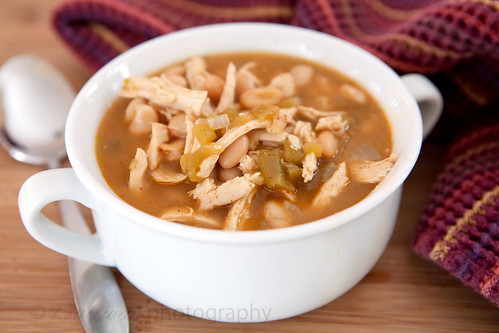
White Bean and Chicken Chili

Nothing says fall and football like chili. My husband loves chili and could probably eat it once a week, but I'm not a huge fan of kidney beans and that often ruins my excitement about chili. So, I decided to make us both happy by coming up with a chicken chili that satisfied his chili craving, but used white beans instead.

White Bean Chicken Chili

photo credit - I adapted this from a recipe in Prevention magazine.

Ingredients
1 Tbs. olive oil
1 rotisserie chicken, shredded
1/2 of a large onion, chopped
2 cans (14.5 oz each) chicken broth (I used homemade, but if you use store-bought I'd go for low-sodium)
1 can (15 oz) cannellini beans (you could use 2 cans if you're bean-crazy), drained
2 garlic cloves, chopped
1 can (4.5 ox) chopped green chilis
1 tsp ground cumin
1 tsp salt
3/4 tsp oregano
1 Tbsp chili powder
1/8 tsp cayenne

Garnishes: chopped cilantro, shredded cheese, sour cream, avocado, crushed tortilla chips

Directions
1. Heat the oil in a large pot over medium-high heat. Saute the onions, garlic, and green chilis about 5 minutes.

2. Add the chicken, broth, beans, and seasonings. Depending on the size of your chicken, you may need to add 1/2-1 cup of water to your pot.

3. Bring to a boil then reduce heat and simmer 10-15 minutes.

4. Garnish with toppings of your choice!


And an idea for left overs!

We had company when we made this, so we had about two bowls-worth leftover. The second day I strained all the liquid then used the meat/veggie mixture as burrito filling! On a burrito-sized flour tortilla I spooned out about 3 tablespoons of brown rice, 1/2 cup of chicken mixture, and a sprinkle of shredded cheese. Then I rolled them up, placed them in a casserole dish, sprayed with cooking spray and baked at 425 for 15 minutes. They came out crispy on the outside and warm and gooey on the inside! I topped the burritos with shredded lettuce, chopped tomatoes, and a dollop of guacamole!  My husband, who is not a fan of leftovers, loved them.

You could also make naked burritos by just spooning the chicken mixture over some rice, then topping with with fixins of your choice.

Wednesday, September 26, 2012

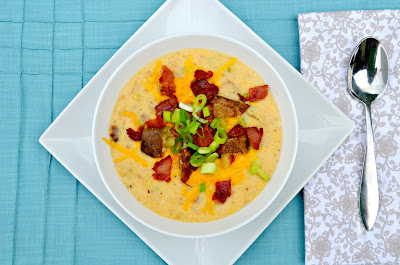
Loaded Baked Potato Soup

I find a good potato soup to be a necessity in anyone's cooking repetoire.  I love broth-based soups, but I LOVE cream-based soups.  This is not a low fat recipe, but it could easily be adapted: low fat broth, low/no fat sour cream or greek yogurt, low fat cheese, reduced sodium bacon... see? Being on a diet does not mean you can't enjoy delicious fare.  I'm not going to lie to you, however, what follows is the full-flavor recipe (and by "full-flavor," I mean that it's not Weight Watchers friendly).

Loaded Baked Potato Soup
adapted from Serena Bakes Simply from Scratch


Ingredients

4 whole Extra Large Baked Potatoes Or 8 Regular Baked Potatoes, peeled, cooked, and chopped.
6 whole Slices Bacon, diced and divided
4 tablespoons Butter
1/2 whole Onion, chopped
2 cloves Garlic, minced
1/3 cup All-Purpose Flour
4 cup Chicken Stock
1/2 teaspoon Sea Salt (or to taste)
2 teaspoons Ground Pepper (or to taste)
3 cups Cheddar Cheese, shredded and divided
4 whole Scallions (Green Onions), chopped
1 cup Sour Cream or Greek Yogurt

Directions

1. Peel potatoes, cook (boil, nuke, or bake), then dice. For a fun idea regarding the skins, see below.

2. In large stock pot brown the diced bacon over medium heat. Remove bacon and drain off the grease.
3. Add 4 tablespoons butter to the brown bits at the bottom of the stock pot. Add onion and continue to cook over medium heat until onion is caramelized. 

4.  Add minced garlic and flour. Stir flour until absorbed by the butter and cooked about 1-2 minutes.
While stirring slowly add chicken stock to the flour mixture to prevent lumps bring to a simmer and turn heat to low. 

5.  Add the insides of diced baked potato. Add sea salt and pepper. Cover pot and continue to cook over low heat.

6.  Add 1/2 of the bacon, 2 cups cheddar cheese, 2/3 of scallions, and sour cream. Stir well and continue to cook over low heat until heated through and cheese is melted.

7.   Serve soup topped with remaining bacon, cheedar cheese, scallions and crisp potato skins (see below).

Crispy Potato Skin Garnish (optional)
In a large saute pan add 2 tablespoons butter and 2 tablespoons olive oil over medium-high heat and cook until butter is melted. Add potato skins and fry until crisp and heated through.