Thursday, December 6, 2012

Quick and Easy Granola Bars (No Bake too!)

Now that I'm pregnant, I'm finding that I need to munch throughout the day.  Calorie-counting and exercising for a year had just about broken this habit and now here I am, actually being encouraged by a doctor to eat more!  Well it's easy to load the pantry with granola bars and snack crackers, and trust me, during the first trimester when all you want to do is puke and sleep, I did.  But now, I'm into the honeymoon period (i.e. second trimester) and I'm sick of store-bought granola bars. I find myself standing in the kitchen in the morning lamenting my lack of snack options.  So I decided to make some of my own, with the focus on protein, well, and deliciousness!

Why I like these..
Most importantly? They are delicious. My husband, who is not a granola bar eater, even thinks they're good!

Second, my experience with homemade granola bars tends to be that they require a lot of expensive ingredients (nuts, seeds, etc) and they can be quite crumbly (if not baked) or overly crunchy (when baked).  These have a thin layer of peanut butter shell that helps hold them together so they are the perfectly soft. In addition, all the ingredients are run-of-the-mill baking basics that you probably have in your pantry.

Finally, you can mix and match. I threw in coconut on a whim and a handful of mini-chocolate chips. You could add raisins, dried cranberries, sunflower seeds, peppercorns... ok, I was kidding about that last one. But my point is that you can make these your own. In addition, I used peanut butter chips for the topping, but you could use milk, dark, or white chocolate, or even butterscotch chips! The sky is the limit, as they say.

Quick and Easy No Bake Granola Bars
adapted from Chocolate Covered Katie.com


Ingredients for Bars
1 cup rice crispies
1/2 cup oat flour, packed (see below about oat flour)
1/4 tsp salt
1 tsp vanilla extract
5 tablespoons honey
3 tablespoons pb (or other nut butter)
1/2 cup broken-up pretzels (I didn’t measure and I ran them through my food processor to chop them)

My add-ins: a handful of coconut and a handful of mini-chocolate chips

Topping: Homemade Peanut Butter Shell
1/4 cup of butter
1 cup peanut butter chips (or other flavor of your choice)
1/4 cup oil (vegetable or canola)

**A Note about Oat Flour: No sense in running out to a health food store and spending $8/lb on oat flour. Instead just take 3/4 cup of quick oats and run them through a food processor until they are flour consistency.  I think this recipe would be just find if you left the oats whole as well. Haven't tried it, but knowing my laziness, I will someday!

Directions for the Bars:
1. Mix dry ingredients in a large mixing bowl and set aside.

2. Mix honey, vanilla, salt, and peanut butter until combined.

3. Add the wet ingredients to the dry and stir until combined. Eventually I just gave my hands a spray of cooking spray and dove right in. It was a lot faster than using a spoon.

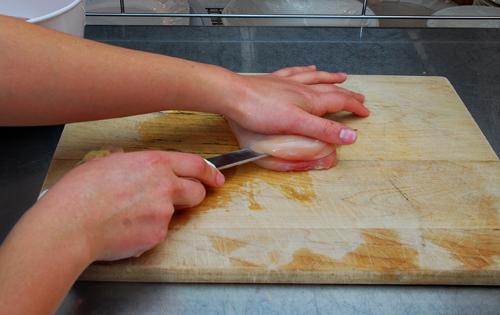
4. Line a baking dish (8x8 or 9x9) or tupperware with wax or parchment paper. Scoop the  mixture in and smoosh it down evenly. REALLY smush it down! I used my bean masher because it is flat to really flatten the bars.  The firmer you mush, the less crumbly they will be.

5. Pop the bars in the fridge while you make the topping.

Directions for PB Topping:
If you are lucky like me, you have a friend named Katie who makes cakes and cupcakes and her own ice creams and other sorts of sweet delicacies.  She gave me the following recipe for Homemade Magic Shell.  So, what I'm telling you, is that you should double this recipe and use some of it for ice cream sundaes! Remember, the calories don't count when you share! :)

1. Melt the chocolate chips and butter over low-med heat. Keep an eye on it and stir often so that the chocolate doesn't stick or burn.

2. Once the chocolate and butter have melted, stir in the oil until smooth.

3. Pour mixture over bars, smooth out evenly, and refrigerate or freeze. I stuck mine in the chest freezer for about 30-45 minutes and they were good to go!

Tuesday, November 13, 2012

Three Cheese Chicken Alfredo Bake

This is why I love cooking...
I adapted this recipe from Plain Chicken.com and Plain Chicken adapted it from Southern Living! I love that recipes are living things that grow and change over time. I also love recipes that are versatile because I often change my mind regarding dinner at the last minute and I'm a fan of recipes that just require throwing ingredients together and calling it a day, especially when I can change up those ingredients according to what I have on hand.

This recipe has been halved. If you double it, you can bake it in a 9x13. I cut it in half because there are only 2.5 of us and even still, I'll be bringing lunch for my co-workers tomorrow!

Three Cheese Chicken Alfredo Bake
adapted from Plain Chicken


Ingredients
1/2 box (8-ounce) penne macaroni (or whatever shape you have on hand)
1 (15-ounce) containers refrigerated Alfredo sauce
1 cup sour cream
1 cup container cottage cheese (you could use ricotta too, I just prefer cottage cheese)
1 large egg, lightly beaten
1/4 cup grated Parmesan cheese
1/4 cup chopped fresh parsley (fresh adds a lot more flavor than dried)
2 Tbsp olive oil
2 garlic cloves, minced
1/2 cup chopped mushrooms
1.5 cups cooked chicken, chopped (I used a rotisserie chicken)
5 oz (1/2 of a 10 oz package) frozen, chopped spinach (defrosted and drained - you literally have to wring it out)
1 cup mozzarella cheese

Directions:

1. Prepare pasta according to package directions; drain and return to pot.

2. Add to noodles: Alfredo sauce, sour cream, cottage cheese, egg, Parmesan and chopped parsley. Stir to combine.

3. Add oil and minced garlic to a skillet and heat on medium until garlic just begins to cook.  Add mushrooms and continue cooking a few more minutes until mushrooms begin to soften.  Add chicken and spinach and heat through (another couple minutes).

4. Add chicken mixture to pasta mixture and stir to combine. I added a little pepper too because the hubs loves peppery Alfredo sauce.

5. Transfer mixture to a lightly greased casserole dish, top with mozzarella, and bake at 350 degrees for 30-40 minutes (depending on the depth of your casserole dish) until browning and bubbly.

6. Serve with soft, buttery breadsticks or garlic bread (and maybe a salad if you're the healthy type).

*Other veggies that would be be good? Broccoli, bell peppers, onions, asparagus, or chopped tomatoes (probably not all at the same time though!)

*This would also be delicious with the addition of cooked, chopped bacon... but then again... what wouldn't?

Monday, November 5, 2012

Hummus

I've had a hummus recipe for a couple years now that I accumulated from somewhere or someone.  I don't know why I've never made it, but yesterday, my mom (who is currently vacationing near Key West) was sending me texts  (including pictures) of this veggie and hummus plate they had made after visiting a local farmers market. This kind of got me thinking about hummus and veggie trays, so I decided to give it a go. It's really as simple as dumping all the ingredients into a food processor and giving it a-whirl.  I thought this turned out so delicious, that I will probably never buy it from the store again!

Hummus

Ingredients:
2 cans garbanzo beans, drained (I used salt-free)
1/2 c tahini
1/3 c warm water
1/3 c olive oil* (see below)
Juice of 2-3 lemons (I used 6 Tbsp of bottled lemon juice)
4 (or more) garlic cloves (I used 4 large ones)
1.5 tsp salt
2 tsp cumin

Directions:
Combine all ingredients into a food processor and blend.

*I only have a 6 cup food processor (because I'm STILL waiting for Santa to bring me a 12-cup) so I had to process in batches.  Therefore, I combined all the ingredients except the oil in a mixing bowl, then poured half into the processor. I then added oil while it was blending until it was the consistency I liked. I scooped it out, then added the other half and did the same thing again.  What I'm saying is, use the oil to adjust the hummus to your desired smoothness.

*Also, I added a roasted red pepper (the jarred kind) to half of the batch because that's my favorite flavor of hummus. So I ended up with half plain and half red pepper flavored.

Today for lunch I brought an "adult lunchable" which consisted of some thin sliced salami, a few cubes of good sharp cheddar, some grapes, a glob of hummus, some cucumbers and cut up naan bread.  It's only 8:30 and I'm already looking forward to it!

Best of luck!


Monday, October 22, 2012

Mom's Tallarines

I'm not entirely sure where this recipe originally came from, but my mom has been making it for quite a while.  I'm not even sure of its original ethnicity. When I run a google search I find Italian translations and recipes, as well as a Peruvian dish.  All I know, is this makes one big pot of hearty, comfort food goodness.  Tallarines provide the heartiness of a good beef stew, but the tomato sauce adds a different, tangier twist. It does make a large quantity so it's a great dish for company. It also simmers in a pot or crock pot all day, which is another factor that makes it perfect for entertaining - little work, lots of glory! Serve it over egg noodles and with some crusty bread on the side and there won't be a rainy day you can't handle!

Mom's Tallarines


Ingredients
2 lb. rump roast, lean; trim fat
3-6 cloves garlic, peeled and whole (really large cloves could be cut in half)
3 Tbsp oil (vegetable, canola, or olive - choose your poison)
2-3 medium sized chopped onions
3/4 cup fresh chopped parsley (or 2-3 Tbsp dried) I used 3 Tbsp Italian Seasoning mix
2-14 oz cans Italian tomatoes (diced or stewed), undrained
2-6 oz cans tomato paste
2-3 cups water
1 jar pimiento, chopped (I used diced red pepper because I had it on hand they are practically the same thing)
4 large carrots, peeled and sliced
3 bay leaves
salt and pepper, to taste
1 cup dry sherry (or leftover red wine that you might have on hand)
1/2 pound chopped mushrooms
1 lb egg noodles

Directions
1. Trim fat from roast. 

2. Make slivers in beef with a sharp knife and insert garlic cloves. I added three cloves to each side of the roast.

3. Heat oil until hot and brown roast on both sides.

4. In the same pot add onions, parsley, tomatoes, paste, pimento, carrots, bay leaves, sherry, and salt and pepper. Add 2 cups of water to start. As it cooks, you can add a little more if you want a soupier consistency. Stir to combine.

5. Cover and simmer 6-8 hours. I did this on the stove, but you could throw the whole thing in a crock pot as well.

6. Check for doneness by sticking a fork in the roast and twisting. If the meat breaks apart easily, then it's done. Use tongs to remove the roast from the pot and shred with a fork. You might be able to do this in the pot if your roast is very tender.

7. Add meat back to the pot and add the mushrooms.

8. Simmer another 20 minutes.

9. In the meantime, cook egg noodles according to package directions.

To Serve:
Dish up egg noodles and top with stew mixture. Garnish with shredded cheddar cheese, if desired. I recommend serving with crusty bread. I made a batch of my top secret beer bread. I'll probably post this recipe another time ;)

Thursday, October 11, 2012

Gooey Patty Melts

These are not low fat, but man are they so, so good. This recipe is, quite literally, the path to my husband's heart. We were inspired to begin making our own patty melts after a bad Steak 'n Shake frisco melt experience. There are some secrets to the perfect patty melt: caramelized onions, Swiss AND American cheese, and some copycat version of frisco sauce.

Gooey Patty Melts
adapted from From Away.com
Patty Melt

Ingredients (for 4 sandwiches)

4 slices of bread of your choice (rye is tradition, I used multigrain ciabatta rolls that I found at Meijer)
3 tablespoons butter
4 slices Swiss cheese
4 slices American cheese
1 pound ground beef
1 large white onion, thinly sliced

Frisco Sauce Ingredients
1/4 cup mayo (the real stuff)
1 Tbsp + 1 tsp ketchup
1 tsp sugar
1/2 tsp dill pickle relish

Directions
1. First caramelize the onions: melt the butter in a saute pan then add the sliced onions. Turn the heat to medium, cover, and stir every five minutes or so.  You want to cook the onions until they are a nice golden brown color. Like this:

Now, the correct way to do this is to let the onions slowly simmer on low heat for almost an hour. I generally keep the heat around low-med and med so that it happens in something closer to 15 minutes. You want to stir every so often to be sure they aren't sticking or burning. When they're done, drain the excess oil, if needed.

2. Separate the ground beef into four patties. Season with salt and pepper or seasonings of your choice and cook to desired doneness in a skillet (we like medium well).

3. Next, whip up the copycat frisco sauce. Simply stir together mayo, ketchup, sugar, and relish. Set aside.

4. Assemble the sandwiches in the following order: bottom slice of bread, Swiss cheese, burger patty, frisco sauce, onions, American cheese, top slice of bread.

5. Spray a skillet with cooking spray, heat it up, then through the sandwich on and brown each side (like you're making a grilled cheese). I sprayed an additional time in between flipping the sandwich.

6. Serve with french fries and a milkshake and you'll never need Steak 'n Shake again!

Sunday, October 7, 2012

White Bean and Chicken Chili

Nothing says fall and football like chili. My husband loves chili and could probably eat it once a week, but I'm not a huge fan of kidney beans and that often ruins my excitement about chili. So, I decided to make us both happy by coming up with a chicken chili that satisfied his chili craving, but used white beans instead.

White Bean Chicken Chili

photo credit - I adapted this from a recipe in Prevention magazine.

Ingredients
1 Tbs. olive oil
1 rotisserie chicken, shredded
1/2 of a large onion, chopped
2 cans (14.5 oz each) chicken broth (I used homemade, but if you use store-bought I'd go for low-sodium)
1 can (15 oz) cannellini beans (you could use 2 cans if you're bean-crazy), drained
2 garlic cloves, chopped
1 can (4.5 ox) chopped green chilis
1 tsp ground cumin
1 tsp salt
3/4 tsp oregano
1 Tbsp chili powder
1/8 tsp cayenne

Garnishes: chopped cilantro, shredded cheese, sour cream, avocado, crushed tortilla chips

Directions
1. Heat the oil in a large pot over medium-high heat. Saute the onions, garlic, and green chilis about 5 minutes.

2. Add the chicken, broth, beans, and seasonings. Depending on the size of your chicken, you may need to add 1/2-1 cup of water to your pot.

3. Bring to a boil then reduce heat and simmer 10-15 minutes.

4. Garnish with toppings of your choice!


And an idea for left overs!

We had company when we made this, so we had about two bowls-worth leftover. The second day I strained all the liquid then used the meat/veggie mixture as burrito filling! On a burrito-sized flour tortilla I spooned out about 3 tablespoons of brown rice, 1/2 cup of chicken mixture, and a sprinkle of shredded cheese. Then I rolled them up, placed them in a casserole dish, sprayed with cooking spray and baked at 425 for 15 minutes. They came out crispy on the outside and warm and gooey on the inside! I topped the burritos with shredded lettuce, chopped tomatoes, and a dollop of guacamole!  My husband, who is not a fan of leftovers, loved them.

You could also make naked burritos by just spooning the chicken mixture over some rice, then topping with with fixins of your choice.

Wednesday, September 26, 2012

Loaded Baked Potato Soup

I find a good potato soup to be a necessity in anyone's cooking repetoire.  I love broth-based soups, but I LOVE cream-based soups.  This is not a low fat recipe, but it could easily be adapted: low fat broth, low/no fat sour cream or greek yogurt, low fat cheese, reduced sodium bacon... see? Being on a diet does not mean you can't enjoy delicious fare.  I'm not going to lie to you, however, what follows is the full-flavor recipe (and by "full-flavor," I mean that it's not Weight Watchers friendly).

Loaded Baked Potato Soup
adapted from Serena Bakes Simply from Scratch


Ingredients

4 whole Extra Large Baked Potatoes Or 8 Regular Baked Potatoes, peeled, cooked, and chopped.
6 whole Slices Bacon, diced and divided
4 tablespoons Butter
1/2 whole Onion, chopped
2 cloves Garlic, minced
1/3 cup All-Purpose Flour
4 cup Chicken Stock
1/2 teaspoon Sea Salt (or to taste)
2 teaspoons Ground Pepper (or to taste)
3 cups Cheddar Cheese, shredded and divided
4 whole Scallions (Green Onions), chopped
1 cup Sour Cream or Greek Yogurt

Directions

1. Peel potatoes, cook (boil, nuke, or bake), then dice. For a fun idea regarding the skins, see below.

2. In large stock pot brown the diced bacon over medium heat. Remove bacon and drain off the grease.
3. Add 4 tablespoons butter to the brown bits at the bottom of the stock pot. Add onion and continue to cook over medium heat until onion is caramelized. 

4.  Add minced garlic and flour. Stir flour until absorbed by the butter and cooked about 1-2 minutes.
While stirring slowly add chicken stock to the flour mixture to prevent lumps bring to a simmer and turn heat to low. 

5.  Add the insides of diced baked potato. Add sea salt and pepper. Cover pot and continue to cook over low heat.

6.  Add 1/2 of the bacon, 2 cups cheddar cheese, 2/3 of scallions, and sour cream. Stir well and continue to cook over low heat until heated through and cheese is melted.

7.   Serve soup topped with remaining bacon, cheedar cheese, scallions and crisp potato skins (see below).

Crispy Potato Skin Garnish (optional)
In a large saute pan add 2 tablespoons butter and 2 tablespoons olive oil over medium-high heat and cook until butter is melted. Add potato skins and fry until crisp and heated through. 

Tuesday, September 11, 2012

Cheesy Sausage Skillet

This is a great meal for those nights when you just want to through everything into a skillet and be done with it. Start to finish I think it took about a half hour, but 15 of those minutes the skillet was sizzling on the stove top while I attending to other matters. It's quick, easy, delicious and versatile - all my requirements for a go-to recipe!

Cheesy Sausage Skillet
adapted from BS Recipes

Ingredients
1 tbsp olive oil
1 lb smoked sausage (I used turkey brats)
1 cups diced onion (half of a medium sized one)
2 cloves garlic, minced
2 cups low-sodium chicken broth
1 (10 oz) can diced tomatees (I like the petite diced. You could also use Rotel)
1/2 cup milk
8 oz penne pasta (or any shape that suits your fancy)
1/2 teaspoon salt and pepper, each
8 oz colby jack cheese, shredded (again, other types would work)
1/3 cup thinly sliced scallions
1 cup broccoli, chopped (more or less as desired)

Directions
1. Add olive oil to an oven-safe skillet over medium high heat until just smoking. Add sausage and onions and cook until lightly browned, about 4 minutes. Add garlic and cook until fragrant, about 30 seconds.

2. Add broth, tomatoes, milk, pasta, salt and pepper and stir. Bring to a boil, cover skillet, and reduce heat to medium-low. Simmer until pasta is tender, about 15 minutes.

3. Remove skillet from heat and stir in about 2/3 of the cheese. Keep about 1/2 cup out to sprinkle over the top. Stir until cheese is melted. then top with remaining cheese and sprinkle with scallions. Broil until cheese is melted, spotty brown, and bubbly.

Some Variations...
*You could change our the veggies as you like. Maybe replace the broccoli with corn? Or replace the tomatoes with Rotel and omit the broccoli.  I wish I would have added mushrooms, but the few in my fridge were already slimy.

*More broth would make this a creamy soup consistency, which would be good.

*You could add chicken or change out the meat entirely: cooked ground sausage, chicken, shrimp...

*You could make it jambalaya-style by keeping the tomatoes and sausage, adding chicken and swapping the broccoli for green pepper.

Oh the opportunities are endless! 

Sunday, September 9, 2012

DIY Pumpkin Spice Latte

First I noticed a trend in fall-themed recipes and posts on facebook and pinterest and then I noticed, upon driving by, that Starbucks is again offering their pumpkin spice latte. Fall is clearly upon us: back-to-school, football, and cool mornings have arrived. Fall is my absolute favorite time of year so I'm all about commencing with the fall activities ASAP.  So, I thought this weekend was a perfect time to try an at-home pumpkin spice latte. I had everything on hand so that makes this latte way cheaper than a starbucks drink! 

Pumpkin Spice Latte
recipe adapted from recipegirl.com


Ingredients:
1/2 cup milk (half n half, whole, 2%, or skim - the fattier, the creamier - you decide!)
1 tablespoon unsweetened canned pumpkin puree
1 teaspoon packed brown sugar
1/4 teaspoon pumpkin pie spice
1 teaspoon vanilla extract
1 cup hot brewed, strong coffee
1 teaspoon granulated white sugar, or more to taste

Optional Toppings:
whipped cream
a drizzle of caramel
ground nutmeg or cinnamon

Directions:
1. In a glass measuring cup or microwave-safe bowl, whisk together milk, pumpkin, brown sugar, spice and vanilla. Microwave for 1 to 2 minutes- watch closely and remove it from the microwave when the milk is hot and frothy.

2. Pour the pumpkin milk into a tall mug or glass. Add hot coffee. Add a teaspoon of sugar. Stir, and taste. Add more sugar, if desired. I filled a tall mug about 2/3 full with coffee and then added the milk mixture. You could do a half-half mix if you aren't a fan of a strong coffee flavor.

3. Optional, but oh so good... add whipped cream on top and a sprinkle of nutmeg. Serve immediately!

*Some tips!
- You could use lowfat milk and then add a tablespoon or two of half n half in step two.  This would cut some fat, but still add back some creaminess.

- I doubled the recipe and then threw the extra in the fridge and have been using it as creamer in my morning coffee. It also goes farther this way because I don't add that much to my coffee.

Sunday, August 26, 2012

Take Out At Home: Sweet and Sour Chicken and Fried Rice


I am almost always in the mood for anything Asian-inspired. From sushi to crab ragoons, this family loves it all!  In terms of fast food-type take out, Chinese is not always the cheapest and it usually makes me sick afterwards. As a result, I'm always on the lookout for Chinese take-out copy cat recipes.  The recipes that follow will completely satisfy any Chinese-food craving you may have. The rice is a new go-to in my kitchen. It's quick and easy and I usually have all the ingredients on hand. It would also be great paired with stir fry. The chicken is not a difficult recipe, but it does take a while to bake, so some planning is needed.  Also, neither of these are low fat, but they are so stinkin' delicious! Well, the chicken is baked, not fried so it less bad for you, but I bet Weight Watchers wouldn't endorse this! ;) I found these on the blog Life as a Lofthouse.

Fried Rice
 

Ingredients
3 cups cooked white rice (day old or leftover rice works best. When I don't have leftover, I make the rice first, then put it in the refrigerator.  Then I make the chicken. When I'm ready to make the rice, it has chilled and makes better fried rice.)
3 tbs sesame oil
1 cup frozen peas and carrots (thawed)
1 small onion, chopped
2 tsp minced garlic
2 eggs, slightly beaten
1/4 cup soy sauce

Directions
On medium high heat, heat the oil in a large skillet or wok. Add the peas/carrots mix, onion and garlic. Stir fry until tender. Lower the heat to medium low and push the mixture off to one side, then pour your eggs on the other side of skillet and stir fry until scrambled. Now add the rice and soy sauce and blend all together well. Stir fry until thoroughly heated!


Baked Sweet and Sour Chicken

The chicken coating:

3-4 boneless chicken breasts
salt + pepper
1 cup cornstarch
2 eggs, beaten
1/4 cup canola oil

The sweet and sour sauce:
3/4 cup sugar
4 tbs ketchup
1/2 cup distilled white vinegar
1 tbs soy sauce
1 tsp garlic salt
*I used a jar of my own homemade pepper jelly instead of making this sauce. You could use the above recipe or use any pre-made, store-bought sweet and sour sauce if you're short on time.
1. Start by preheating your oven to 325 degrees. 

2. Rinse your chicken breasts in water and then cut into cubes. Season with salt and pepper to taste. 

3. Dip chicken into the cornstarch to coat then dip into the eggs. (I combined the chicken, cornstarch and eggs in a ziploc bag and shook it!)  

4. Heat your 1/4 cup oil in a large skillet and cook your chicken until browned but not cooked through. 5. Place the chicken in a 9x13 greased baking dish. Mix all of your sweet and sour sauce ingredients in a bowl with a whisk and then pour evenly over the chicken. 

5. Bake for one hour and during the baking process you will need to turn the chicken every 15 minutes. Be sure to check it. It only took my chicken a half hour to cook through. Maybe I just my chicken into smaller pieces?

Thursday, August 9, 2012

Chipotle Chicken Salad

I don't have a picture of this recipe because, last week when I made it for company, we were halfway through polishing off the bowl when I said, "Oh, I should post this online!"  This recipe originally came from Gourmet magazine. I used to have a subscription. I ended up with that subscription because two cute young men came to my door and convinced me that they were competing to win a trip and if I could please buy a magazine subscription from them it would help them earn points. Well, I was young... and they were cute, so I did. Back in those days, I didn't appreciate much that Gourmet had to offer. I was just beginning to cook, but this recipe is one that I tried and it has been a staple around here ever since.

It's light and fresh and perfect for a hot day. In addition, it's pretty easy to throw together. It's one of my husband's favorite recipes of all time. I like it because it doesn't require any cooking and I can whip it up pretty last minute. It requires only about 15 minutes of prep time! Also, it does contain adobo sauce, but the salad is not spicy However, you could add a little more if you like a little kick. The Fritos seem like an odd addition, I realize, but they are what make the meal! Once I substituted crushed tortilla chips and it just wasn't the same.

Chipotle Chicken Salad

1 rotisserie-cooked chicken (2 lb) at room temperature
1 medium white onion, chopped (I have also used chopped green onions in a bind)
1 (15 oz) can black beans, rinsed and drained
1/2 cup packed fresh cilantro sprigs
1 rounded tablespoon canned chipotles in adobo, or to taste
1/3 cup olive oil
1/3 cup fresh lime juice
3/4 teaspoon salt
3/4 teaspoon black pepper
2 firm-ripe avocados, halved, pitted, and chopped (err on the side of firmer, they'll be easier to cut up)
3 oz corn chips such as Fritos (1 1/2 cups)
1 heart of romaine, separated into leaves (optional)

Directions

Remove chicken from bone and chop or shred into medium-large chunks, then toss together with onion and black beans in a large bowl.

Purée cilantro, chipotles, oil, lime juice, salt, and pepper in a blender or food processor, and add to chicken mixture.

Toss chicken mixture with chips. Scoop avocado into chicken mixture with a spoon (basically just do this gently so that you don't mush the avocado up). Serve salad on romaine leaves if you want to be fancy, or just scoop salad into a bowl and enjoy!

Anyone I've ever served this to has loved it. Once my tupperware was passed around the teacher's lounge so everyone could have a taste! 

*Note: The Fritos will get soggy if you store this overnight. On the other hand, they are much yummier when tossed with the dressing. I generally pick them out of my leftovers, then add a handful of fresh ones before eating. They add a salty, crunch which is a great contrast to the avocado, chicken, and bean mixture.

Tuesday, July 31, 2012

A Night in Italy

Last weekend we went to Ohio for a wedding and on the way home we were listening to Splendid Table on NPR. A woman called in and asked for advice about a menu for her friends who were making their first trip to America from Italy. The caller said she had enjoyed many amazing meals with said friends in Italy and wanted to offer them an Italian-style dinner that featured American fare. The host, Lynne Rossetto Kasper, came up on the spot with a mouth-watering menu, and she described it (in her ever-soothing voice) mouth-watering course by mouth-watering course. I was inspired by this style of eating: many small courses, deconstructing a meal, element-by-element and savoring each piece. I love the idea of allowing time, wine, and conversation to lead the way. I've never been to Italy, but I read Eat, Pray, Love, so I've got it covered ;)

Well, my garden is currently full of cherry tomatoes and my friend Laura has been to Italy, so I decided it was a great night for an Italian-style dinner. Here is the menu, bolded recipes listed below. 

  • Bruschetta 
  • Hummus
  • Meat and Cheese Plate: goat cheese and cranberry white cheddar, 
  • Volpi Pinot Grigio Salami
  • French Bread
  • Red Grapes
  • Venetian Panino (simple, but delicious finger sandwiches)
  • Salad with Sweet Balsamic Vinaigrette
  • Ricotta, Spinach, and Bacon Ravioli with Herb Butter Sauce
  • We also enjoyed a bottle of Viognier (a crisp, refreshing white wine. If you've never had it, you should check it out)

Venetian Panino (original recipe here)  
This is a Giada de Laurentis recipe. You may know how I feel about this woman. Seriously, how can she eat half of what she cooks and remain a size -5? In addition, I find her cleavage distracting.  Well today I soldiered on and watched and entire episode of Everyday Italian. This is where two of these recipes originated. I, of course, made a few changes.


I didn't think to take pictures until later and the
 light was bad and I was lazy.. I apologize.

Ingredients
- 8 ounces Gruyere, shredded (Emmentaler  is cheaper, generic Swiss even more so - any of these would work)
- 2 tablespoons butter, at room temperature
- 2 tablespoons Dijon mustard
- 1 garlic clove, chopped
- 12 ounces sliced turkey
- 12 slices wheat or sourdough bread, crusts removed (I used french bread. You can make these whatever size you want. I made small ones)
- 6 tablespoons olive oil (canola or vegetable would work in you're in a bind)


Directions
1. Into a food processor add the cheese, butter, mustard, and garlic. Blend until the mixture is thick, smooth and spreadable.


2. Spread the cheese mixture over 1 side of each bread slice.


3. Arrange the turkey slices over the cheese mixture on 6 of the bread slices.


4. Top sandwiches with the remaining bread slices, cheese mixture side down, pressing gently to adhere.


5. Cut the sandwiches in half (or don't, it's completely up to you!)


6. Heat 3 tablespoons of oil in a heavy skillet over medium-low heat. Cook half of the sandwiches until golden brown and heated through, about 4 minutes per side.


Salad with Sweet Balsamic Vinaigrette
I originally was inspired by this salad, but I ended up just using the dressing recipe.
  
My salad components were: baby romaine, sliced almonds, dried cranberries, caramelized onion, and goat cheese.


The dressing:
1/2 cup sugar
1 ½ tablespoons poppy seeds
1 ½ tablespoons sesame seeds
1 teaspoon paprika
2 teaspoons dried mustard (I used two teaspoons of Dijon mustard)
1 tablespoon minced sweet onion
1 teaspoon sea salt
1 teaspoon freshly ground black pepper
1/2 cup white balsamic vinegar (I used pomegranate red wine vinegar)
1/3 cup vegetable oil
1/3 cup extra virgin olive oil

Directions:
Throw all of these ingredients into a food processor or blender and blend away! Or, throw into a jar and shake, shake, shake. OR, throw into a mixing bowl and whisk! The options are endless!! This dressing is light, refreshing and very sweet. It be really good on fish and I also dipped my ravioli in it too!

Ricotta, Spinach, and Bacon Ravioli with Herb Butter Sauce
The original recipe was Prosciutto Ravioli, but I had bacon already and it's cheaper!


I made this for only two of us so I did not make all 48 raviolis. I made about 12. I saved the extra filling and plan to use it in either lasagna or manicotti.  Also, the original recipe says to boil some water, cook the pasta for a couple minutes, then drizzle the butter sauce over. I didn't want to heat a pot of water for just 12 raviolis so I sauteed mine in the butter sauce (directions below).


Ingredients
- 1 (15-ounce) container whole milk ricotta cheese
- 1 (10-ounce) package frozen chopped spinach, thawed, squeezed dry (really wring it out so that you don't have soggy raviolis)
- 1/2 lb bacon, cooked and chopped (I used 6 slices)
- 2 large egg yolks
- 3/4 teaspoon salt
- 1/2 teaspoon freshly ground black pepper
- 48 wonton wrappers

Butter sauce:
- 1/2 cup (1 stick) butter
- 1 1/2 teaspoons dried oregano
- 1 clove garlic, minced
- Freshly grated pecorino (I used Parmesan)

Directions:
1. Whisk the ricotta, spinach, prosciutto, egg yolks, salt, and pepper in a medium bowl to blend.

2. Place 1 tablespoon of the ricotta filling in the center of a wonton wrapper.

3. Brush the edge of the wrapper lightly with water. Fold the wrapper in half, enclosing the filling completely and forming a triangle. Pinch the edges to seal. Transfer the ravioli to baking sheets.
4. Repeat with the remaining filling and wrappers. (Can be prepared up to 2 hours ahead; cover and refrigerate.)

5. Melt the butter in a heavy small skillet over medium heat. Add the oregano and garlic and stir 1 minute. Season, to taste, with salt and pepper. Add the raviolis (you might have to process in two batches) and saute a couple minutes on each side (until golden brown).

6. After the raviolis were heated through, I poured the remaining butter sauce into a small dish and served it as a dipping sauce.  These are seriously amazing.

.


Wednesday, July 25, 2012

Lemon Poppy Seed Zucchini Muffins

Here is yet another use for the zucchini that may be overflowing in your garden. I like plain old zucchini bread, but I get tired of it. These muffins (which can also be made as a bread loaf or in a bundt pan) are so good and, if you have a picky eater, you wouldn't even know there's zucchini in them!  I used a large zucchini so I had to scoop the seeds out. I also peeled it because the skin is tougher in the large ones. The peeled zucchini meant no little green specks in the batter (a good way to hide the veggie!).

Lemon Poppy Seed Zucchini Muffins
This recipe comes from Modern Alternative Mama.com. I replaced sprouted flour with half whole wheat, half white. You could use all wheat or all white as well.

Ingredients:
2 c. flour (I used whole wheat)
1 tsp. baking soda
½ tsp. salt
¼ tsp. nutmeg (I always use pumpkin or apple pie spice because I have it on hand)
Zest of 1 lemon
2 tbsp. poppy seeds

3 tbsp. butter, softened
½ c. sugar
1 egg
¼ c. maple syrup (I used the real stuff)
1 tsp. vanilla
Juice of 1 lemon (easy thanks to my fancy new juicer!)
1 c. zucchini, shredded (peeling is optional)

Directions:

1.  Preheat oven to 350. 

2.  In a large bowl, mix all dry ingredients thoroughly.

3.  In a medium bowl, cream butter and sugar. 

4.  Add egg and maple syrup and blend together. 

5.  Add vanilla, lemon juice and zucchini and stir until smooth. 

6.  Pour liquid ingredients into dry ingredients and stir until just combined. 

7.  Pour into greased muffin tins, loaf pan, or bundt pan. Bake muffins for 15-20 minutes, bread/cake for 40 – 50 minutes, until a toothpick comes out clean.

I will definitely keep this recipe around. The muffins were so good. Not too lemony (in fact, I'd like a bit more lemon flavor) and very moist. A good, basic poppy seed muffin recipe. 

Tuesday, July 24, 2012

Quick and Delicious Hamburger Buns

Found this recipe from Taste of Home via Pinterest. I've wanted a quick and easy recipe for buns, so I was excited to try this out.  I read all the reviews and made a few adjustments. My recipe is below. The original recipe can be found here. These were, just as the recipe promised, easy and so delicious.  On a day below 80 degrees, I will probably make several batches and freeze them. You can freeze the dough before they rise or after the baked buns cool.  They would also be great shaped into sub or hot dog buns.  I used half wheat flour and half white. They were good, but very wheaty - I'd try them with just white flour next time. I really may never buy hamburger buns again!

Quick and Delicious Hamburger Buns
from Taste of Home.com
40-Minute Hamburger Buns Recipe


Ingredients
- 2 Tbsp active dry yeast (I used fast rising because that's what I had)
- 1 cup, plus 2 Tbsp. warm water (110-115 degrees) - this is just HOT water from your tap
- 1/4 cup butter, melted
- 1/4 cup sugar
- 1 egg
- 1 tsp. salt
- 3 - 3-1/2 cups all-purpose flour (I used 3 cups for the dough and a half cup when kneading)
- 1 egg white
- 1 tsp. cold water

Directions
1. In a large bowl, dissolve yeast in warm water. Add melted butter and sugar; let stand for 5 minutes.

2. Add the egg, salt, and enough flour to form a soft dough (I added 3 cups)

3. Turn onto a floured surface; knead until smooth and elastic, about 3-5 minutes. Do not let rise.

4. Divide into 10 pieces (obviously 8 would yield larger buns, 12 would yield smaller); shape each into a ball. Place 3 inches apart on a greased baking sheet. I patted mine down a bit so they were more hamburger-bun-looking, rather than dinner-roll-looking.

5. Let rise for 20-30 minutes.

6. Whisk egg white and water together then brush tops of rolls.


7. Bake at 425 degrees for 8-12 minutes or until golden brown. Remove from pan to wire rack to cool.

Here's the nutrition information from Taste of Home. This assumes you make 12 rolls. I made 8 and they were just slightly larger than the cheap ones you buy in the store.


Nutritional Facts1 serving (1 each) equals 195 calories, 7 g fat (1 g saturated fat), 18 mg cholesterol, 204 mg sodium, 29 g carbohydrate, 1 g fiber, 5 g protein.

Originally published as 40-Minute Hamburger Buns in Best of Country Breads , p45

Monday, July 23, 2012

Better-than-Rice-A-Roni Cheesy Zucchini Rice

I'm not sure if you've heard, but it's been hot... and dry.  I don't have AC so the "cooking" has been relegated to sub sandwiches, salads, and take-out these past two weeks. Most fast food makes me sick so we're talking eat-in resturants and our bank account is starting to complain. I told my husband I would make a more concerted effort to get back on the cooking bandwagon. Even if we're only eating sandwiches, we just can't afford to eat out so often.

In addition, the garden is bursting at the seams with zucchini, cucumbers, and I think my potatoes are already  ready to dig! Yesterday I gathered about a dozen juliet cherry tomatoes and my first big heirloom of the season (one of the chickens had taken a bite out of it, but 90% of it is still good!). I've made several jars of refrigerator pickles and I've given a ton of zucchini away (I'm also minding my neighbor's huge garden which has yielded more zuke than I can manage!) Zucchini is my favorite vegetable and I'm perfectly content to saute it in a little olive oil with some garlic, mushrooms, and rosemary, but even I can't eat all of this zucchini! I shredded and froze about 10 cups of it. So this week I'm going to do some baking because, in addition to all the zukes, we just found the eggs our hens have been hoarding under the rose bushes:

So I'm thinking some baking is in order! Maybe later in the week - today it's almost 100!  Today I did use one small zucchini in this homemade rice-a-roni style dish. 

Cheesy Zucchini Rice
from bunsinmyoven.com - a blog that I suggest you check out. All the recipes look wonderful!

When I was in college I loved those rice or noodle packets that you can whip up in 15 minutes.  In fact, I do still like them, but calories, sodium, and just plain guilt generally keep me from buying them.  I was thrilled to stumble upon the following recipe during my pinning one warm evening.  I made it for lunch today and both Dylan and I loved it.  As a dinner dish I might also add mushrooms and/or chopped tomatoes. It would also be great with chopped chicken, salmon, or black beans. So versatile, which is what I like!

Ingredients
1 tablespoon olive oil
1 cup long-grain white rice
2 cups chicken broth (I used Swanson's fat free)
2 tablespoons butter
1 medium or 2 small zucchini, grated
1 cup shredded sharp cheddar (I used Cabot's 75% reduced fat and it was still delicious)
1/2 teaspoon garlic powder
salt and pepper, to taste
splash of milk, as needed

Instructions

1.  Heat the olive oil in a medium sauce pan over medium heat.

2.  Add the rice and stir to coat. Toast the rice, stirring often, just until it starts to turn golden.

3.  Pour in the chicken broth and garlic powder, bring to a boil, turn heat to low, and cover.

4.  Cook, covered, for 15 - 20 minutes or until most of the liquid is absorbed.

5.  Remove from the heat and add the butter, grated zucchini, and cheddar. Stir until well incorporated. 

6.  Cover and let sit for 5 minutes.

7.  Stir again and add salt and pepper to taste and a splash of milk if you'd like to thin out the texture a little bit.

Seriously it was so good and so easy you will never buy Rice-A-Roni again! You could add any veggie, really and could play around with seasonings. Maybe add salsa? Give it a try and let me know! ;)

Nutrition Information
This makes about 4- 1/2 cup servings.
One serving: 175 cal  /  47 carbs  /  3 g fat   /   15 g protein

Monday, July 9, 2012

Easy Refrigerator Pickles

When it comes to store-bought pickles, I feel neutral.  I use them on hamburgers, but I'm not a huge fan of just munching them straight out of the jar (there are people who do that, you know).  A couple years ago I began making refrigerator pickles out of necessity... so many cukes! so little time! I will tell you, a fresh refrigerator pickle is nothing like the salty, mushy store-bought variety. Refrigerator pickles are crisp, fresh, tangy, and just a little salty.  Also, these pickles require a few simple ingredients that you probably already have on hand. You can pick up a quart of small cucumbers at your local farmers market if you don't grow them yourself. In addition, you can store them in any glass container-  you don't have to use canning jars.


Digression: Personally, I feel that making things from scratch is only necessary when the homemade version is cheaper, more nutritious, and/or more delicious. I once made a pumpkin pie from scratch. I mean, from scratch. I started with a pie pumpkin and some flour. I did it all: cooked the pumpkin, scooped out the flesh, made the crust from hand, everything.  When it came out of the oven I prepared myself for the greatest pumpkin pie experience of a lifetime...well, it tasted like pumpkin pie...  Don't get me wrong, it was good, but it didn't taste any more magical than one made with canned pumpkin and it had taken me all day!  And so, I now limit my from-scratch excursions into areas where it is to my advantage in some way to do so!

Okay, back to pickles. Back when I believed I could convert my husband into a veggie lover (so far I've only achieved veggie eater, not veggie lover), I planted a huge garden with complete disregard as to what he would actually eat.  Then I ended up with more produce than two adults needed (or wanted, in my husband's case).  It was then that I discovered pickling because the hubs draws the line at cukes. He just plain hates them. He likes pickles, however.

When you can pickles the "real" way (using a hot water bath), you can't eat them right away and it can be a bit of a gamble as to whether they turned out or not. You wait 3 weeks, crack the jar and then say, "oh, last year's were better." Also, you need to follow a recipe pretty rigidly so that the acidity is just right and they don't go bad. This can be tough if you only have a few cukes on hand. Refrigerator pickles, however, are quick and easy and you don't need any canning supplies to make them! They are also more flexible with cucumber quantity.  In the past I've used a recipe that I pieced together that uses canning salt, but this year I tried a new one that uses only ingredients you most likely have on hand!

Also, somewhere along the way we discovered that my husband's boss loves pickles. He's the kind that will sit and eat an entire jar (I told you there were people like this). So one year I gave him a small jar and I received such rave reviews that I decided refrigerator pickles were the way to go!  His wife told me he ate the jar in about 15 minutes and, from a man who considers himself a bit of a pickle-connoisseur, I take that as a compliment!

So this recipe is from Urban Preserving.com and I definitely think it's a keeper:


Small Batch Refrigerator Pickles
makes two pints - I made 3 pints and 2 quarts out of 3.5 pounds of cucumbers. I tripled the water/vinegar/salt solution)

1 quart small cucumbers (approximately 1 1/2 pounds)
3/4 cup apple cider vinegar
3/4 cup filtered water
2 teaspoons sea salt
2 teaspoons dill seed (I used dill weed)
4 garlic cloves, peeled
2 spring onions (whites only), chopped (you could chop up yellow or red onion instead)

Directions:

Wash and dry cucumbers. Chop ends off and slice into spears. Set aside.

Combine vinegar, water and salt in sauce pan and bring to a boil. (Note to self: to not inhale over boiling vinegar... it hurts).

Equally divide the dill seed, garlic cloves and chopped onion between the two jars. 

Pack the cucumber spears into the jars as tightly as you can without crushing them - really smush 'em in there! I hold the jar on its side when I pack them:

Pour the brine into the jars, leaving 1/4 inch headspace. Put lids on the jars and let them cool on the counter top. Once they’re cool, put them in the refrigerator. Let cure for at least a day before eating. Pickles will keep in the fridge for up to a month.

Some pickling notes...
- Because I'm a pickle rebel, I made some cut into chips instead of spears, you are allowed to do this.

- I packed some into larger jars, this is also allowed, you'll just need to add a little more onion, garlic, and dill.

- You can play around with the spices: add a little cumin or pepper maybe?

- If you use actual jars and canning lids, you'll hear the seals pop as they cool.  Don't be fooled, the USDA says this is not a legit seal and they still have to be refrigerated.

- You don't have to use canning jars. I like glass for many reasons, but you could use any container with a tight seal - as long as you can back the cukes tightly.

- I've used fresh dill instead of dried in the past. Works just as well, but I didn't grow any this year so I just used store-bought.

- Write the date on the lid, this way you won't find some in the back of your fridge and wonder how long they've been lingering there. If they spoil, you'll know because they'll be super mushy.


Friday, June 22, 2012

Crispy Ranch Chicken and Oven Chips

A friend of mine actually came up with this recipe and was kind enough to share it with me! She said her husband raved and, since I've been in a bit of a cooking slump, I was thrilled to have a new recommendation! I agree with her: easy and tasty! My occasionally-picky three-year-old ate everything on his plate and said, "This is so good, mama." I like to use chicken cutlets because they are thinner and cook faster and more evenly. They are also a lot less calories than a thick, meaty breast (haha). You can "make your own" chicken cutlets by simply cutting a thick chicken breast in half ... lengthwise? widthwise? I'm not sure how to describe it. You'd butterfly it, but cut all the way through? Like this (thank you google images!):


Okay, now that we've gotten that taken care of, another reason you'll like this recipe is because it's a great way to use up the last stragglers of potato chips that seemed to hang out in your pantry forever (at least they do at my house). They've been forgotten and shoved to the back of the pantry to make room for a new bag of fresh, crisp, whole potato chips.  You could sub breadcrumbs as well (plain, Italian, or panko would all work.

Crispy Ranch Chicken


Ingredients


  • 4 chicken breast cutlets
  • 3/4 cup ranch - I used my homemade ranch
  • 1 - 2 cups crushed potato chips, any kind (or breadcrumbs) - the thickness of your chicken will account for how much "breading" you'll need.


Directions
1. Create a dipping assembly line:
2. In a large skillet, heat a tablespoon of olive oil at medium heat. 

3. Dip each chicken breast in the ranch ( shake off excess) then in the potato crumbs (shake off excess).

4. Cook on medium heat for about 5-6 minutes on each side (again, depends on thickness). *Resist all urges to move these around or check underneath during the first 5 minutes. This will give the breading time to crisp up. I also recommend using a turner to flip rather than tongs, it will help preserve the crust!

Nutrition? There are many variables when calculating nutrition for this recipe: size of cutlet, brand of dressing, potato chips vs. breadcrumbs.  I used a 4 oz. chicken breast, my homemade ranch, and season kettle chips. This adds up 300 calories for one chicken breast.


Thick-Cut Oven Chips
These were a simple side item that would completely satisfy a french fry craving, but spare you the guilt! My recipe served two and a half of us (the toddler counting as the "half").
Ingredients 
  • 3 medium-sized Russet potatoes (about 5 oz each)
  • Season salt (I used Lawry's)
  • Non-fat Cooking Spray (you could use olive oil, but that means more calories)


Directions
1. Preheat oven to 500 degrees (yikes, right?)

2. Wash and scrub potatoes then slice into 1/8-inch rounds (see picture above). I use a mandolin to do this, but you can use a sharp knife. Don't worry about the thickness, but do try and keep them close to the same so that they cook evenly.

3. Liberally spray your cookie sheet with cooking spray, or better yet, cover it with foil and then spray it liberally with cooking spray!

4. Lay the potato slices out in one layer.

5. Spray slices with cooking spray then sprinkle with seasoned salt (we're going to do this to the other side later so don't go crazy with the salt!)

6. Bake for 25 minutes. Midway through, pull potatoes out, flip and coat with cooking spray and a sprinkling of season salt again.

Nutrition? A 5 oz baked potato is 130 calories. If you use cooking spray, you're adding zero calories and the same is true of season salt! However, if you're watching your sodium intake, go lightly on the Lawry's and see the variations below.

Variations:
You could completely omit the salt altogether by using Italian seasoning, or fresh rosemary and garlic powder, or even chipotle seasoning. Pretty much any savor spice would be great!

Thursday, June 21, 2012

Father's Day Oven-Baked Ribs

We just celebrated Father's Day this past Tuesday. I had planned to do something with shrimp and then, a day or two before, my husband says, "You should make ribs. We never make ribs." He's right. I attempted ribs once when we were first living together and it must not have been a glorious moment because I've never made them again, nor have I had any interest in making them since!  Partly, I don't particularly care for ribs. I remember going through a phase in middle school when I liked them, but they seem to me to be a lot of work for little nibbles of meat.  Well I'm about to offer you a recipe that might just change your mind. It certainly changed mine! Partly, it was the BBQ sauce, though; the BBQ sauce recipe that follows is absolutely to die for (and I don't use that cliche lightly). It's a sauce that leans a bit more to the teriyaki side of things, but since eating these ribs, I've dreamed of other uses for that heavenly sauce! Also, this recipe is so, so easy. Your guests will think you're Bobby Flay, and will never know how little effort you actually put forth!

Oven Baked BBQ Ribs
Sorry for the glare, took this picture in a hurry! The men were drooling!

Ingredients

Ribs
3-4 lbs baby back pork ribs
1/2 cup dry rub (below)
Most Delicious BBQ Sauce (below)

Dry Rub (combine the following):
1/4 cup brown sugar
1 Tbsp of each: paprika, chili powder, garlic powder
1 tsp of each: salt, pepper, cumin


Most Delicious BBQ Sauce (from TheComfortofCooking.com)
Wisk all ingredients together and set aside:
1/2 cup brown sugar
1 tsp. dry mustard
1/4 cup ketchup
1/4 cup soy sauce
1/4 cup Worcestershire sauce
1/4 cup onion, minced
2 cloves garlic, minced
1 tbsp. salt
1 tbsp. freshly ground pepper

Directions:
1. Pat ribs dry and slather with a 1/2 cup of the dry rub. Give those ribs a good rub down. You want the brown sugar to dissolve a bit.

2. Wrap the ribs in foil (be sure it's sealed up because you will have juices). Place on a cookie sheet with a lip (also called a jelly roll pan in some circles) and pop in a 300 degree oven for 2-1/2 - 3 hours. That's it!  I placed my ribs meat side down so that they could simmer in their own juices... That'll teach em!

3. Around the 2-1/2 hour mark, check the ribs for tenderness. You can do this a couple different ways: wiggle the bones around and see how loose they feel in the meat and/or stick a fork in a meaty party and twist it, you want the meat to give way without much effort.

4. Once the meat is tender, turn the oven to 350 degrees, and pull the ribs out. You'll want to drain the juices and flip the rack over so they are sitting (in the foil) meat side up.  Keep the foil open, exposing the ribs, and brush with BBQ sauce. You'll want to be fairly liberal here. Use about a third of the sauce.

5. Bake for an additional 25-30 minutes, basting every 10-15 minutes, until the sauce caramelizes.

That's it!  

I served mine with homemade coleslaw, loaded baked potatoes, and warm, french bread.

P.S. That BBQ sauce would be wonderful on chicken (think kebobs), salmon, or in a beef stirfry - just to name a few places that have been bouncing around in my head!

Sunday, June 17, 2012

Ice Cream Cake for Cheaters

I'm not sure where I found this recipe. I know it was years ago and I feel like it was in a magazine - maybe while sitting in a waiting room somewhere? Anyway, it was in my pre-pinterest days... do you remember those? You can make any number of variations and it is so simple, yet so good, that people will think you are very fancy! First I've shared the basic recipe, then I've listed some variations.

Ice Cream Cake for Cheaters


Ingredients
12 ice cream sandwiches (I used cookies and cream flavor)
1 tub whipped chocolate frosting (You could make this from scratch.... you could...)

Seriously, that's it!

Directions
1. Place a layer of four ice cream sandwiches side-by-side on a platter.
2. Over the top, spread a thin layer of frosting (it serves as the glue between layers).
3. Then place another layer of sandwiches, then frosting.
4. When you're done, frost the entire "cake" with frosting (top and sides).
5. Place in the freezer without covering.
6. Let it firm up (about an hour) then cover with foil. Leave it to harden another hour or two then serve and dazzle your guests!

Variations:
- You could use any type of ice cream sandwich: mint chocolate chip, strawberry, plain, or a mix of flavors.
- You can substitute cool whip for frosting or replace the chocolate frosting with any flavor of your choice.
- In between layers you could add chocolate, strawberry, or caramel syrup or crushed cookies, nuts, or candies.
- After you frost, but before you freeze, you could sprinkle on crushed cookies, candies, nuts, or sprinkles to add a decorative flair.

The sky's the limit!

Tuesday, June 5, 2012

Baked Orzo with Fontina and Peas

I found the following recipe on the Cooking Channel's web page. It's a Giada De Laurentiis recipe and, I don't know about you, but I think that people who cook Italian food all day, but remain pencil-thin can't be trusted! :)  It's as though she is immune to carbs!

Well 2012 has been the year of the mushroom as I have craved mushrooms for months straight. I'm adding them to everything, even when recipes don't call for them! In addition, the combination of mushrooms, wine, garlic, and thyme, just sends me over the top, so I was thrilled to find the following recipe.  Also, my husband prefers rice to pasta and orzo is a rice-like pasta so he was thrilled. Ok, he wasn't exactly thrilled, he said something like "Cool."  ... that's how my husband exhibits "thrilled."

The original recipe uses an entire pound of orzo, but I cut it in half. My version is below.

Baked Orzo with Fontina and Peas


Baked Orzo with Fontina and Peas 
INGREDIENTS
2 cups chicken broth
1/2 pound orzo pasta
2 tablespoons butter, plus more to grease the baking dish
1/2 onion, chopped
8 ounces mushrooms, sliced
3/4 cup Marsala wine (I used a red table wine that I had on hand)
1/4 cup heavy cream (I used 2% milk because that's what was in the fridge)
1/2 cup shredded fontina cheese (I used a pre-shredded parm, fontina, asiago mix)
1/2 diced fresh, diced mozzarella (fresh would be wonderful, I used the shreds)
1 cup frozen peas, thawed
1/2 teaspoon salt
1/2 teaspoons freshly ground black pepper
1/2 cup bread crumbs
1/4 cup grated Parmesan (I used the same mix I mentioned above)
1 teaspoon dried thyme

DIRECTIONS
Preheat the oven to 400 degrees F. Grease a casserole dish or 9x9 pan.

Bring the chicken broth to a boil over medium-high heat in a medium saucepan. Add the orzo and cook until almost tender, about 7 minutes. Pour the orzo and the broth into a large bowl. Set aside.

Meanwhile, melt the butter over medium heat in a medium skillet. Add the onions and saute until tender, about 3 minutes. Add the mushrooms and continue to saute until the mushrooms are beginning to turn golden around the edges, about 7 minutes. Add the Marsala. Scrape the brown bits off the bottom of the pan and cook until the Marsala has reduced by half, about 5 minutes. Add the mushroom mixture to the orzo in the large bowl. Add the cream, fontina, mozzarella, peas, salt, and pepper. Stir to combine. Pour the mixture into the prepared baking dish.

In a small bowl combine the bread crumbs, Parmesan, and dried thyme. Sprinkle the bread crumb mixture on top of the pasta. Bake until golden, about 25 minutes.

Nutrition: 
The original recipe (with heavy cream and fresh mozz) is 350 calories per 1 cup serving. I imagine the substitutions lighten it up a bit, but My Fitness Pal was giving me problems tonight so I'll have to update this later.

Overall...
I thought this was good, but I'd make some changes in the future. First of all, I'd add several cloves of garlic to the onion and mushroom mix because I love, love, love garlic. I also thought it would be delicious to first saute a few strips of bacon, set it aside and cook the onions/garlic/mushroom mixture in the bacon grease and THEN add the chopped bacon to the mix.  It was a great side dish, however, to a protein with a strong flavor.  For example, I served this with spicy and salty tortilla-crusted tilapia (a store in my town sells these and they are amazing!). The orzo mix is a nice, mellow pairing with something like this fish.

It would also be good with additional veggies: broccoli, asparagus, and water chestnuts would be good (in any combination). Or you could toss some diced chicken into the mix as well.  Because of it's versatility, this dish is definitely a keeper.